


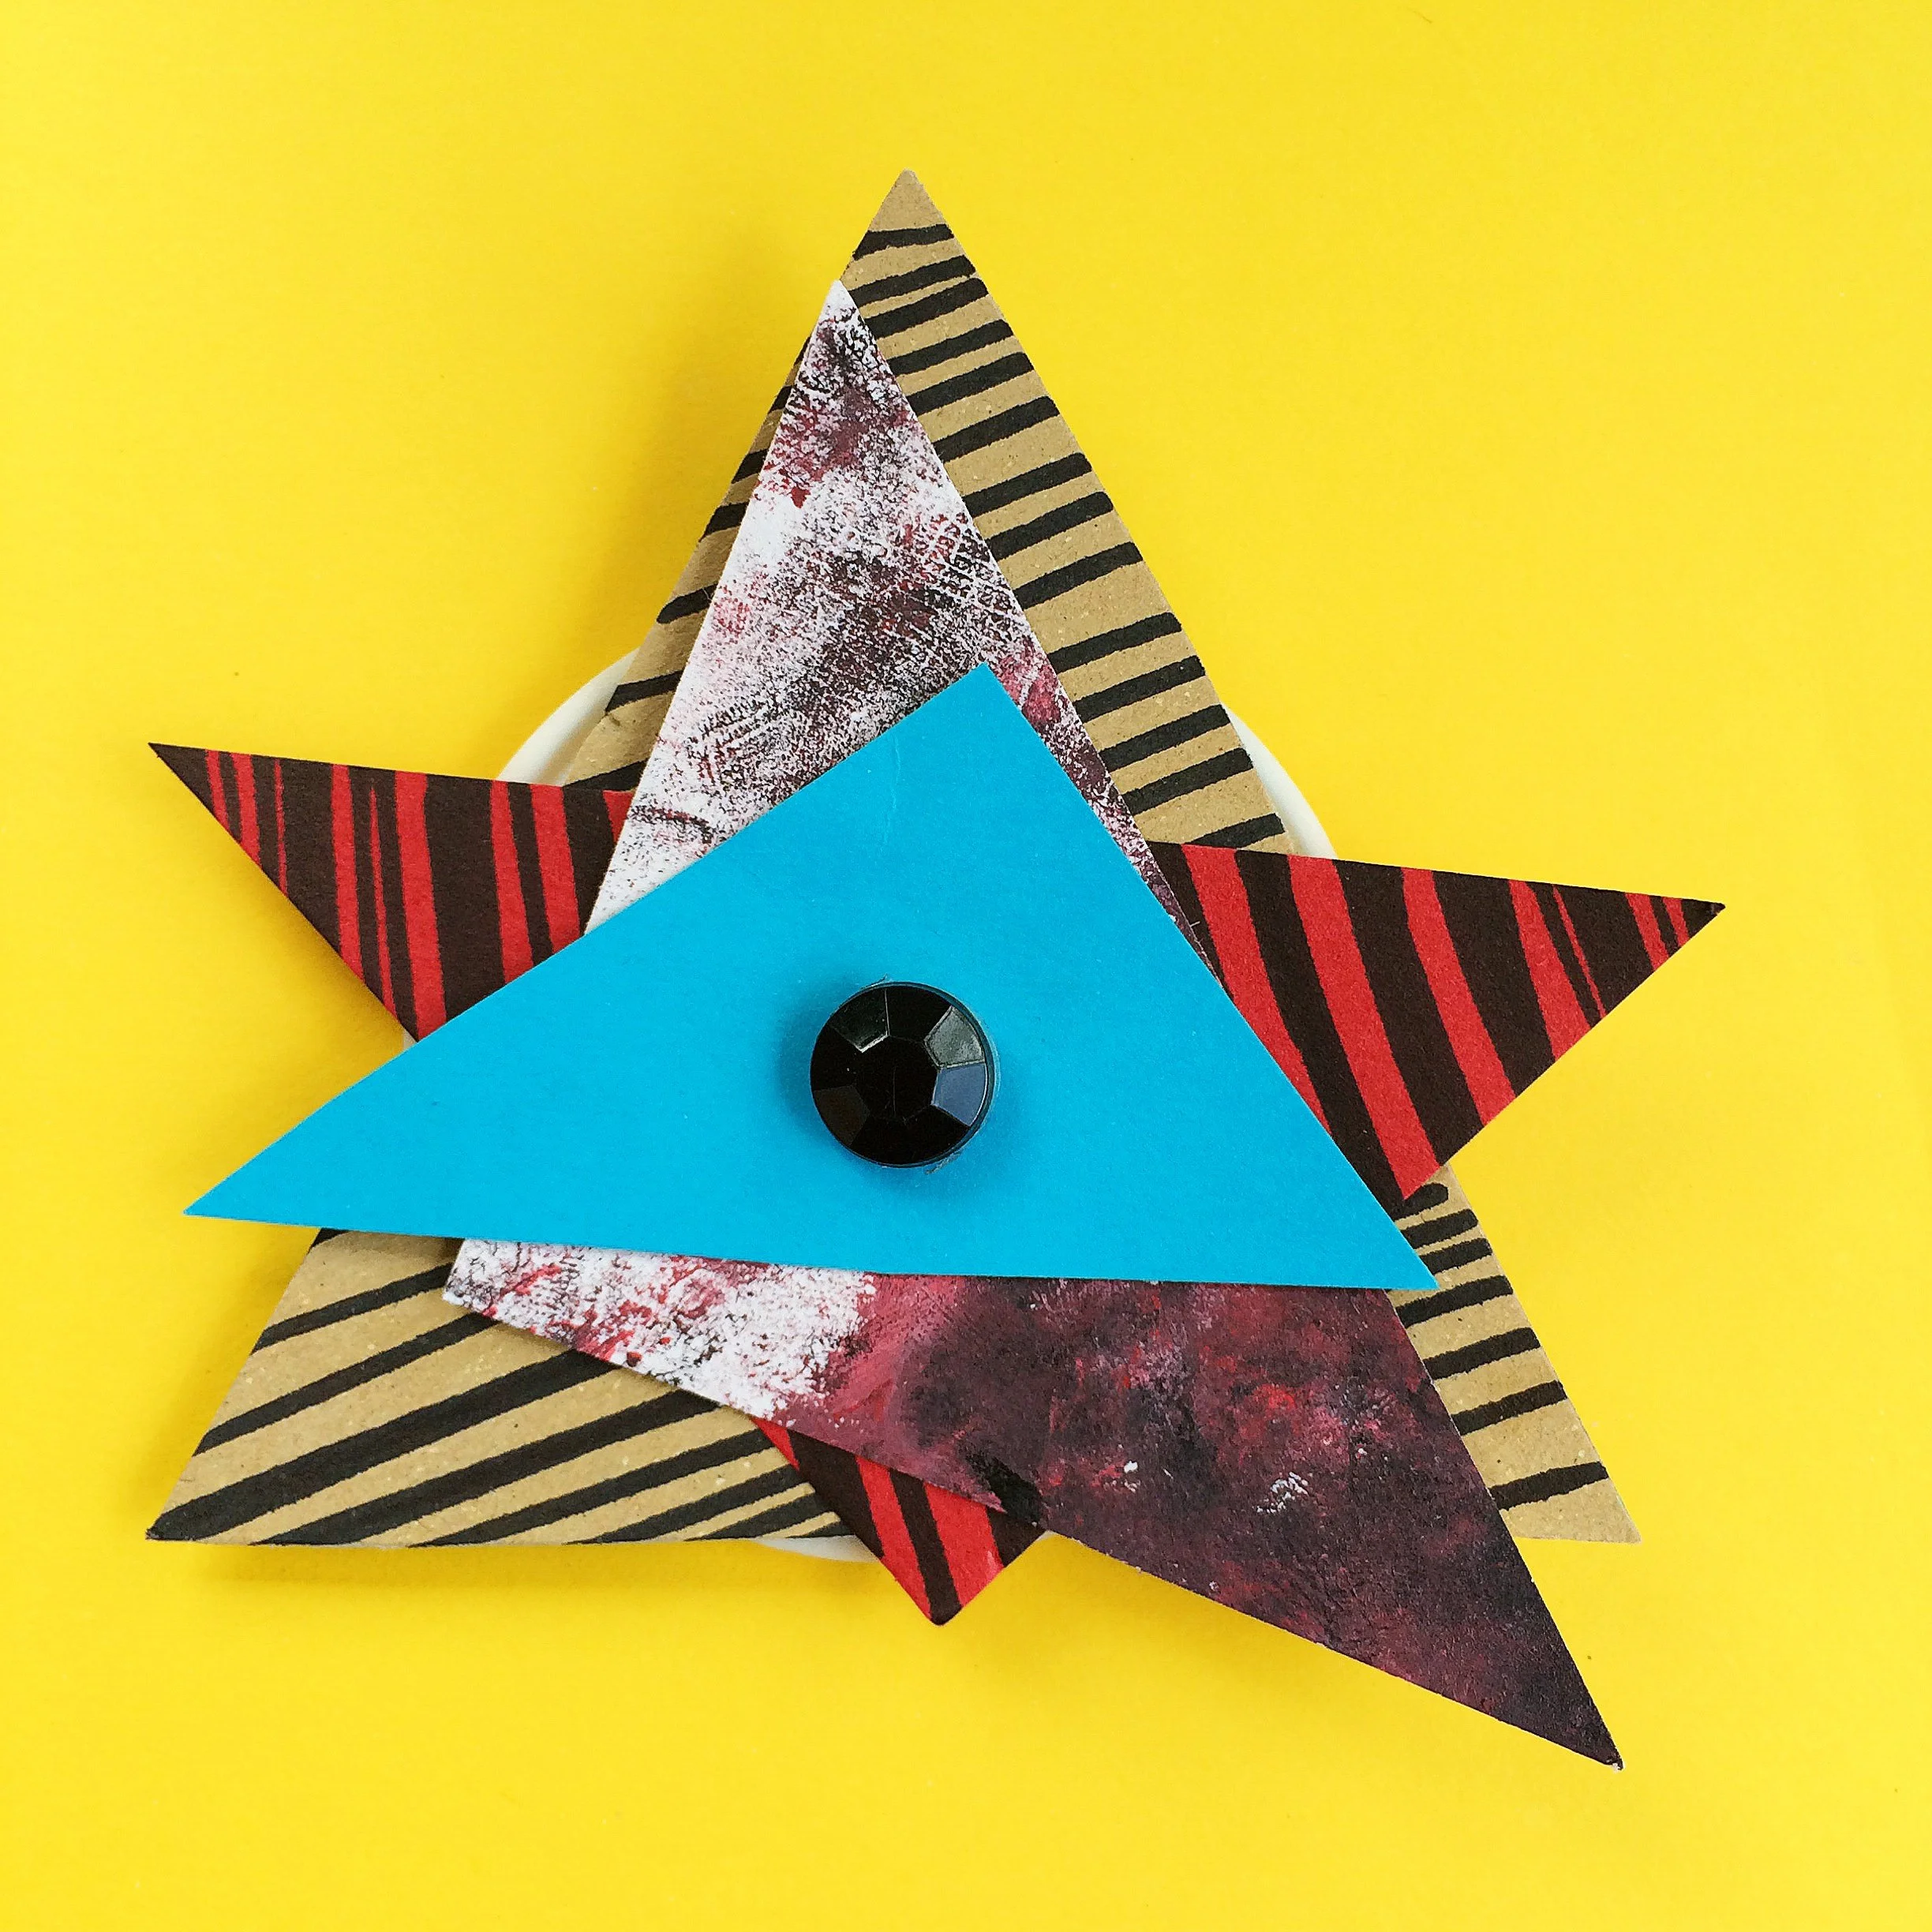
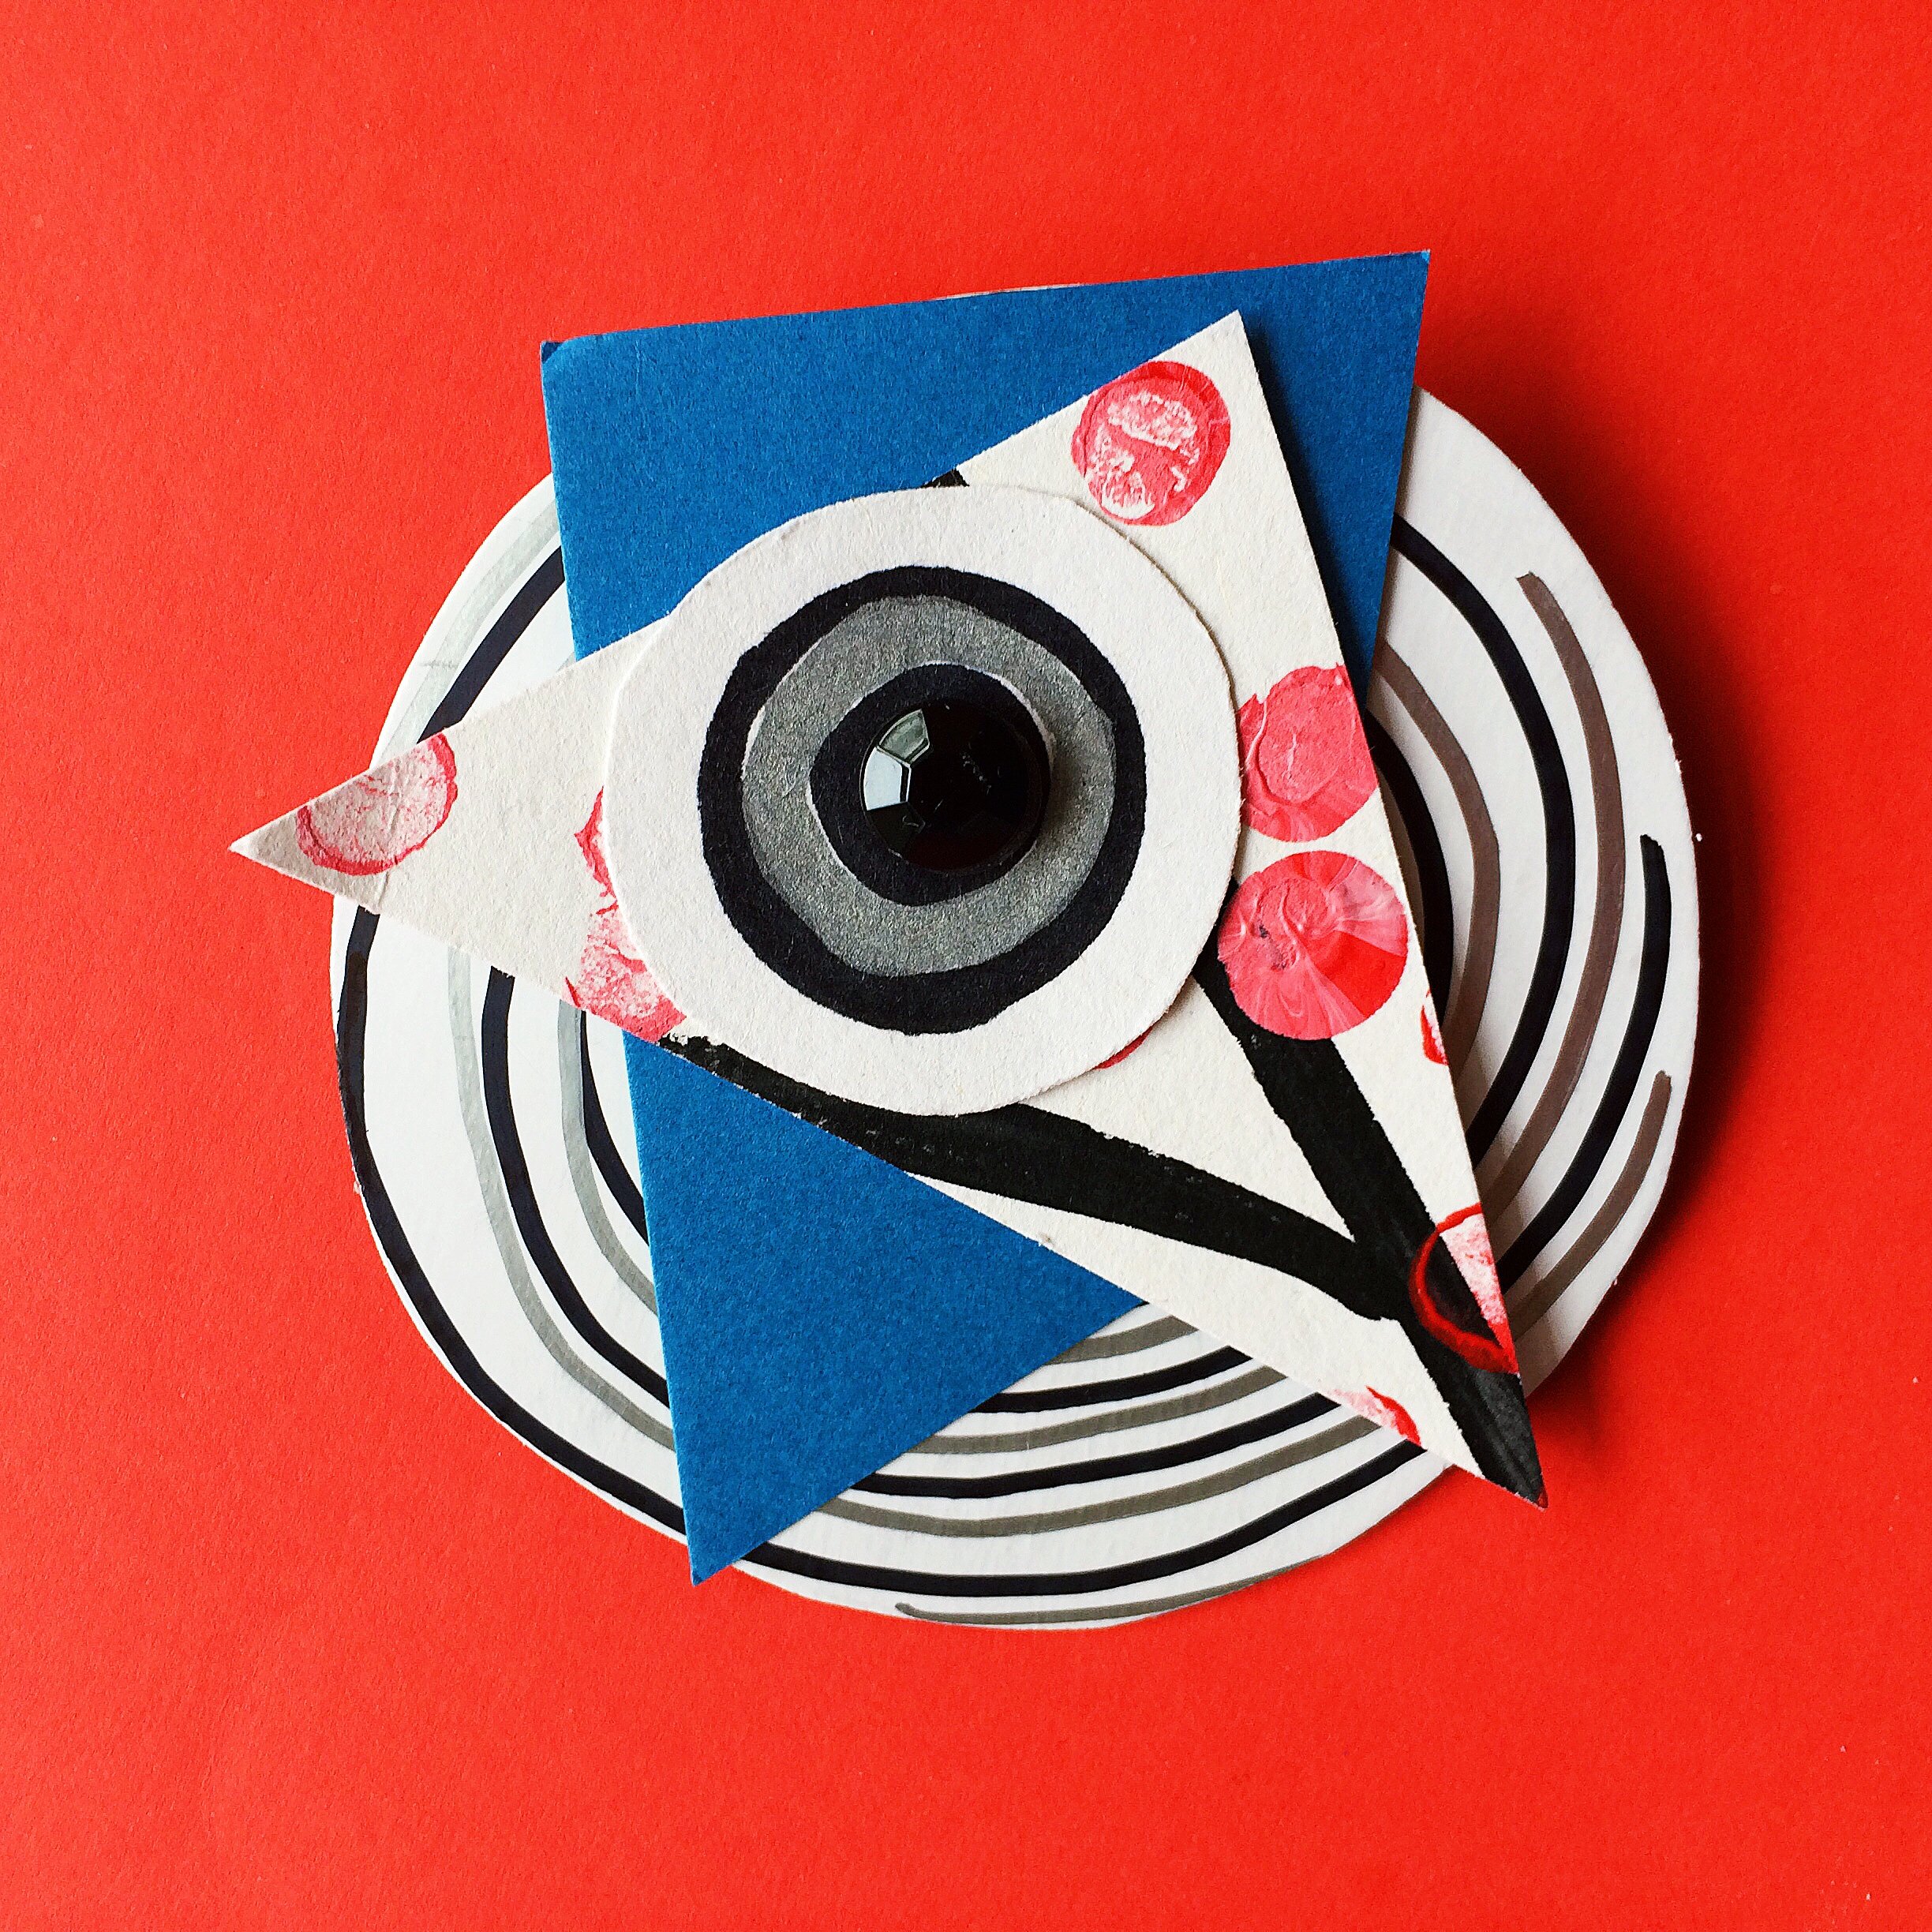
FANTASTIC SCRAPTASTIC BROOCHES
To be honest, I was never a very good jewellry student at uni. I was very impatient with metal and lost count of the amount of times the fire brigade were called to campus because of the amount of smoke I created in the soldering room. I was however good at a simple technique called riveting. Rivets are components used for joining metal (and sometimes other materials). A hole is drilled through both pieces of work and the rivet is placed through them before being beaten with a small hammer which causes the metal to expand slightly and fuse the two sheets together. I mention all of this because to be honest even though relatively easy, it's probably not very kid friendly and in my humble opinion you can achieve many of the same effects with a humble split pin (sometimes called a brad)
For this project I have used cardboard scraps and pieces of old artworks but you could try a variety of materials. As long as they can be hole punched or pierced with a blade they can be used. The back piece for these is also cardboard but will need to be slightly thicker than the layers on top.
This project looks pretty spectacular but is actually incredibly simple and would be suitable from about 6+. Basic cutting skills required.
WHAT YOU NEED:
- Thin coloured cardboard off cuts and some old artworks
- A few pieces of slightly thicker cardboard (think shoe box cardboard or similar)
- Split pins/brads
- Brooch backs or large safety pins
- Jewel stickers (optional)
- Glue and or tape (depending on which brooch fitting you are using)
TO MAKE
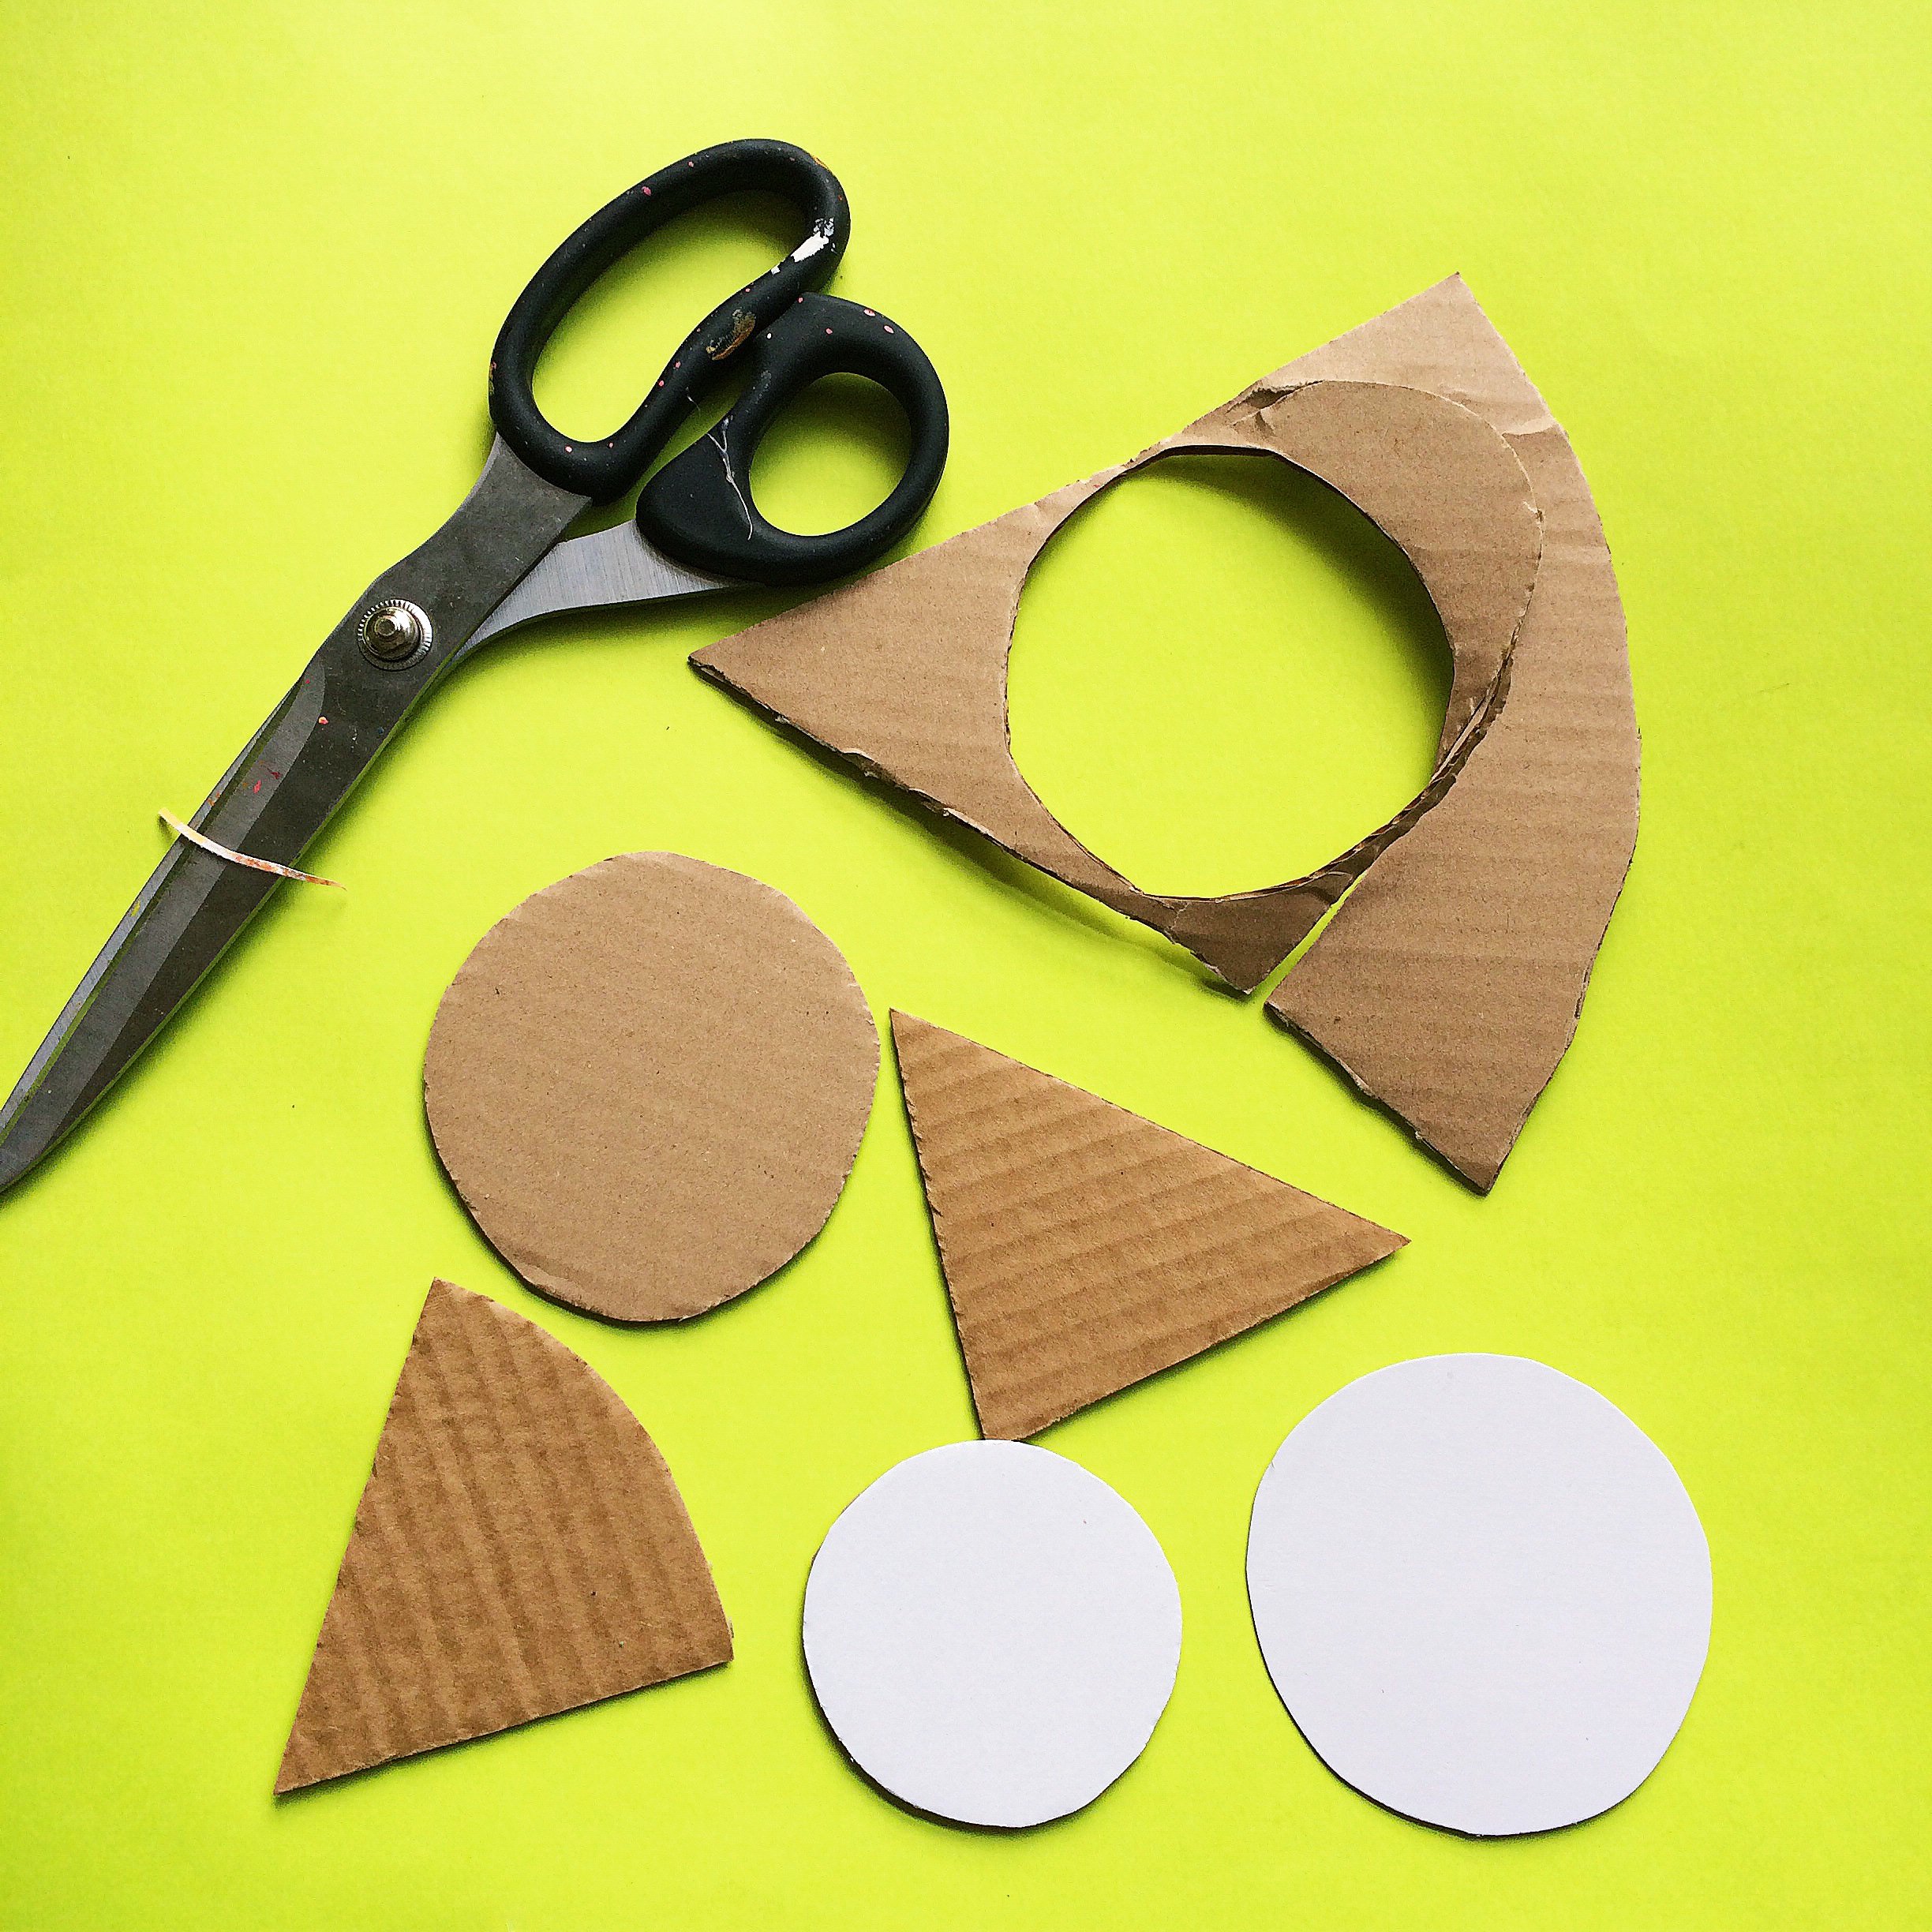
1. Begin by cutting out some basic shapes from cardboard. Try to use cardboard that isn't too thick. The size and shape is totally up to you.
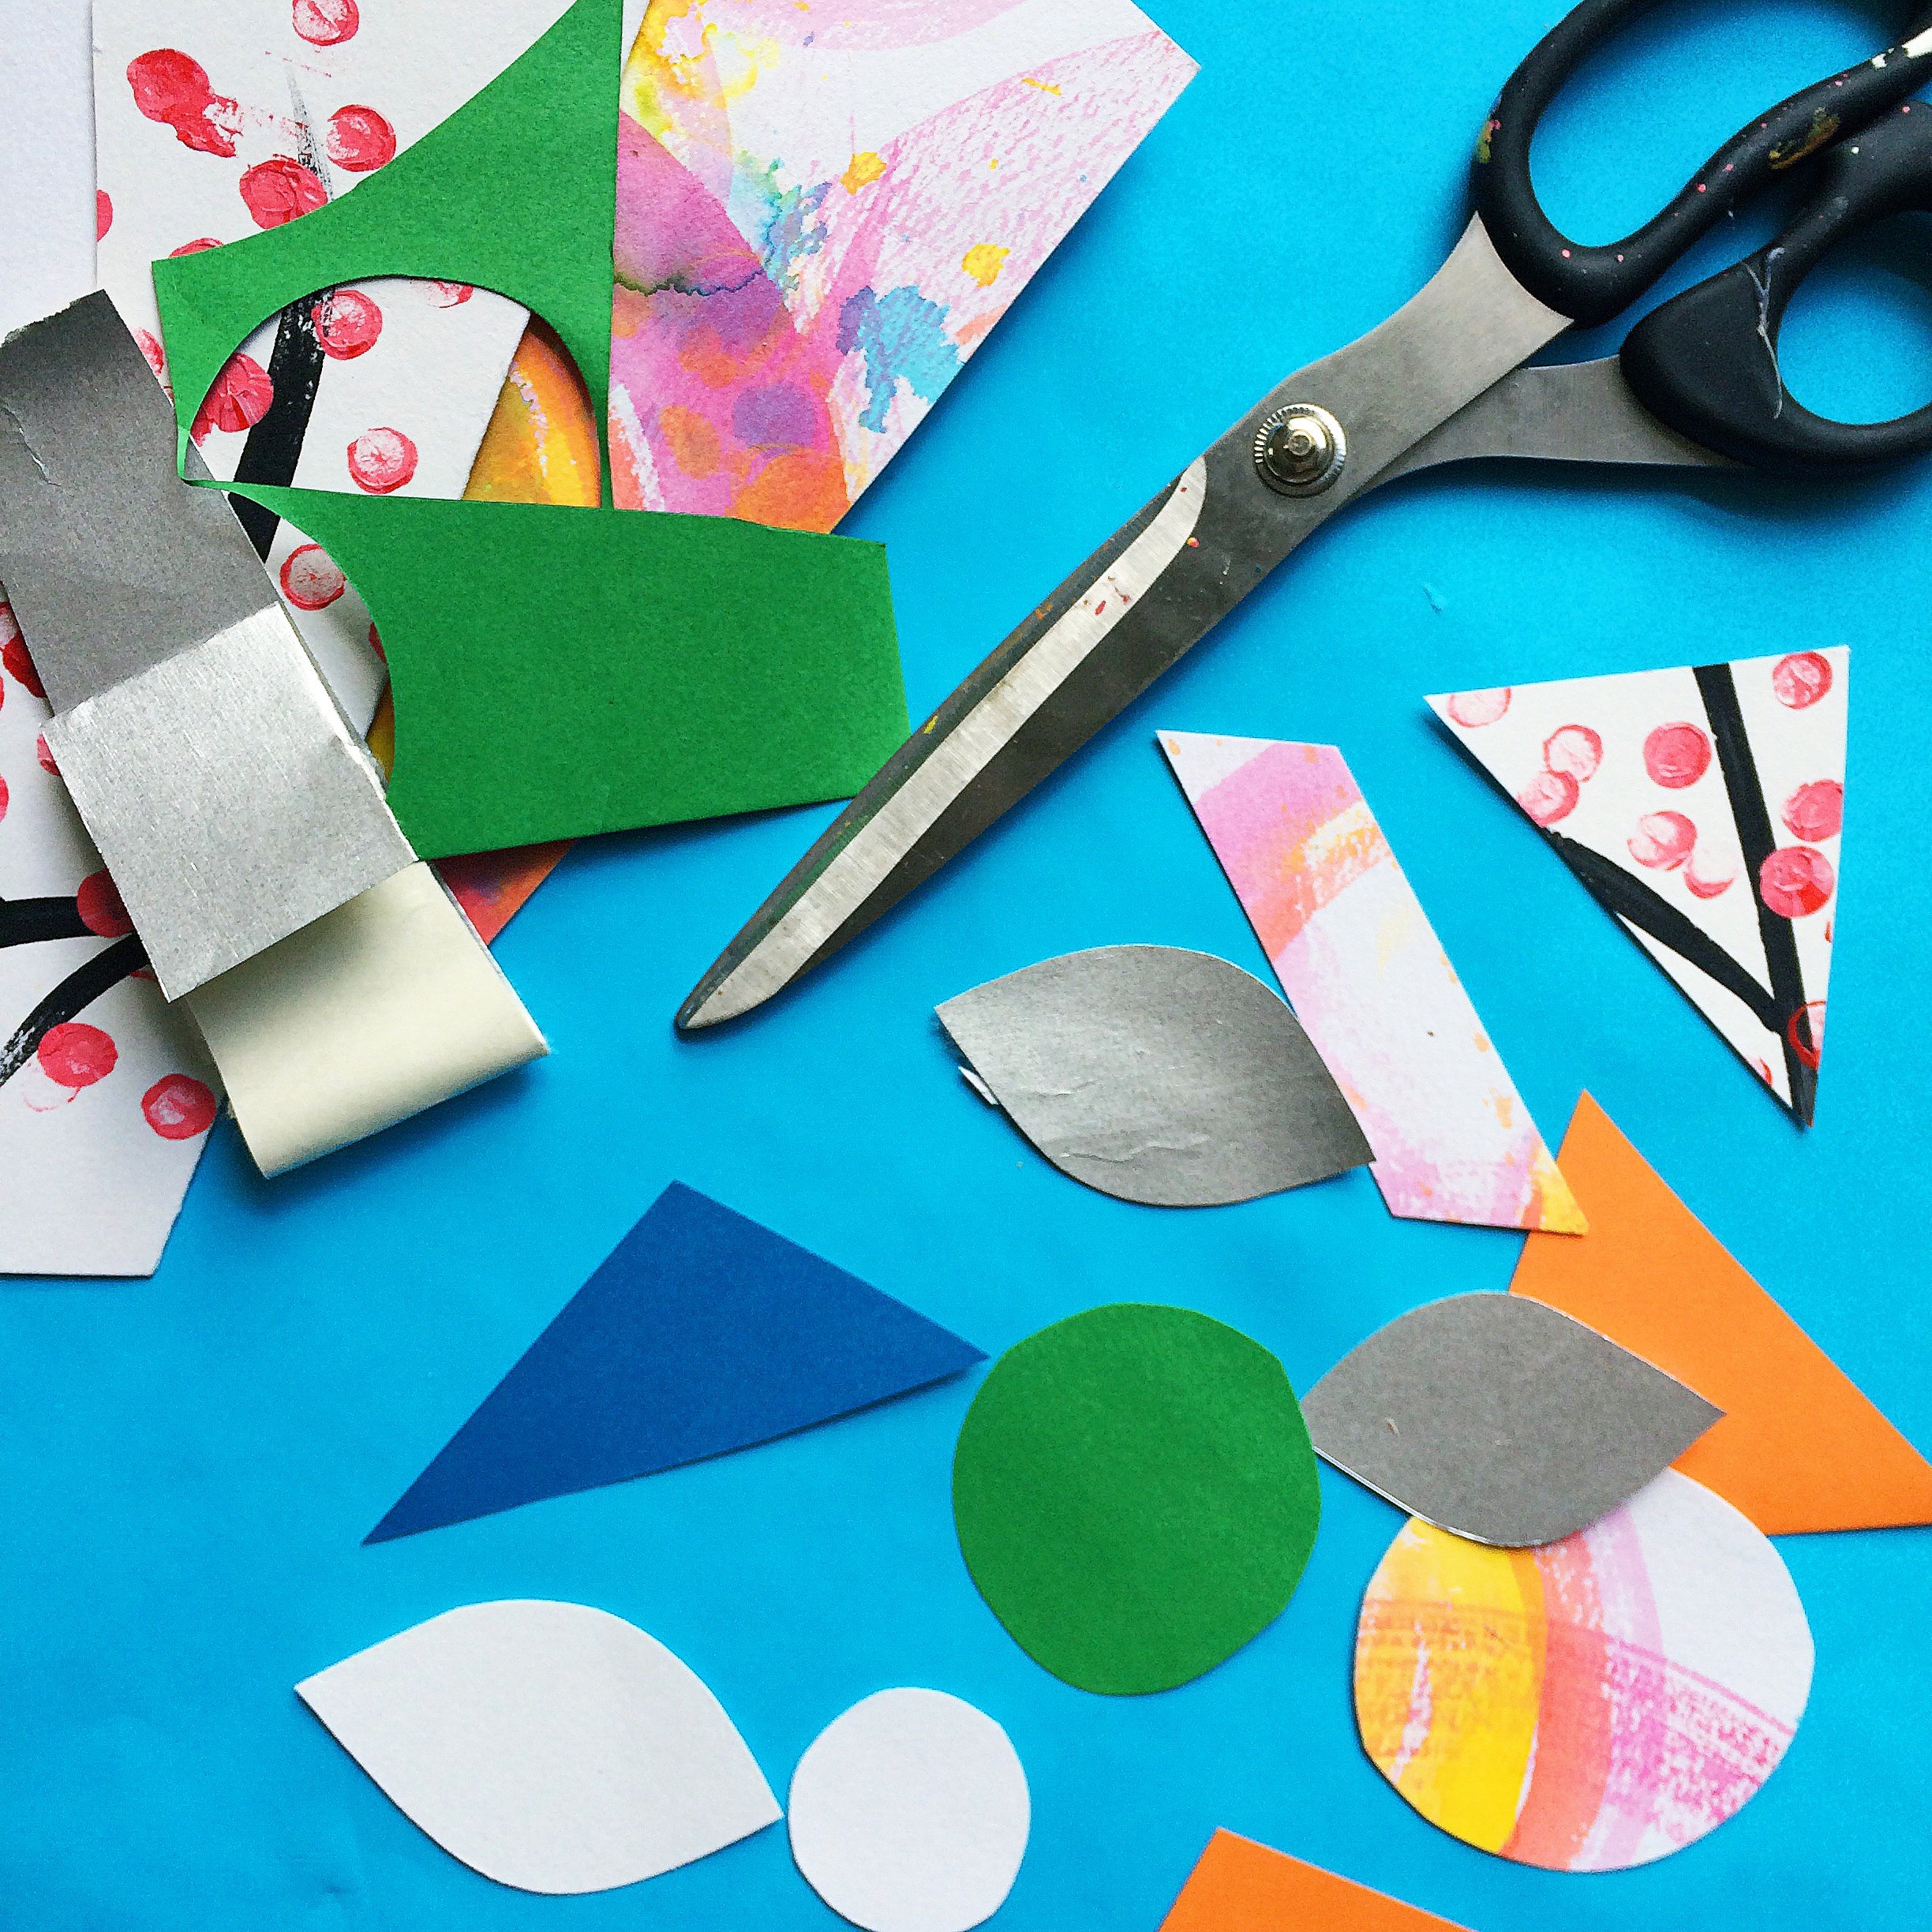
2. Cut a bunch more shapes using cardboard and old artworks. You can use paper as long as it is thick. We used watercolour paper for some of the shapes and it worked nicely. If you are doing this with small children you could try and draw some shapes before hand and practice some fine motor skills by following the line. I cut these freehand though so feel free to do what works for you here.
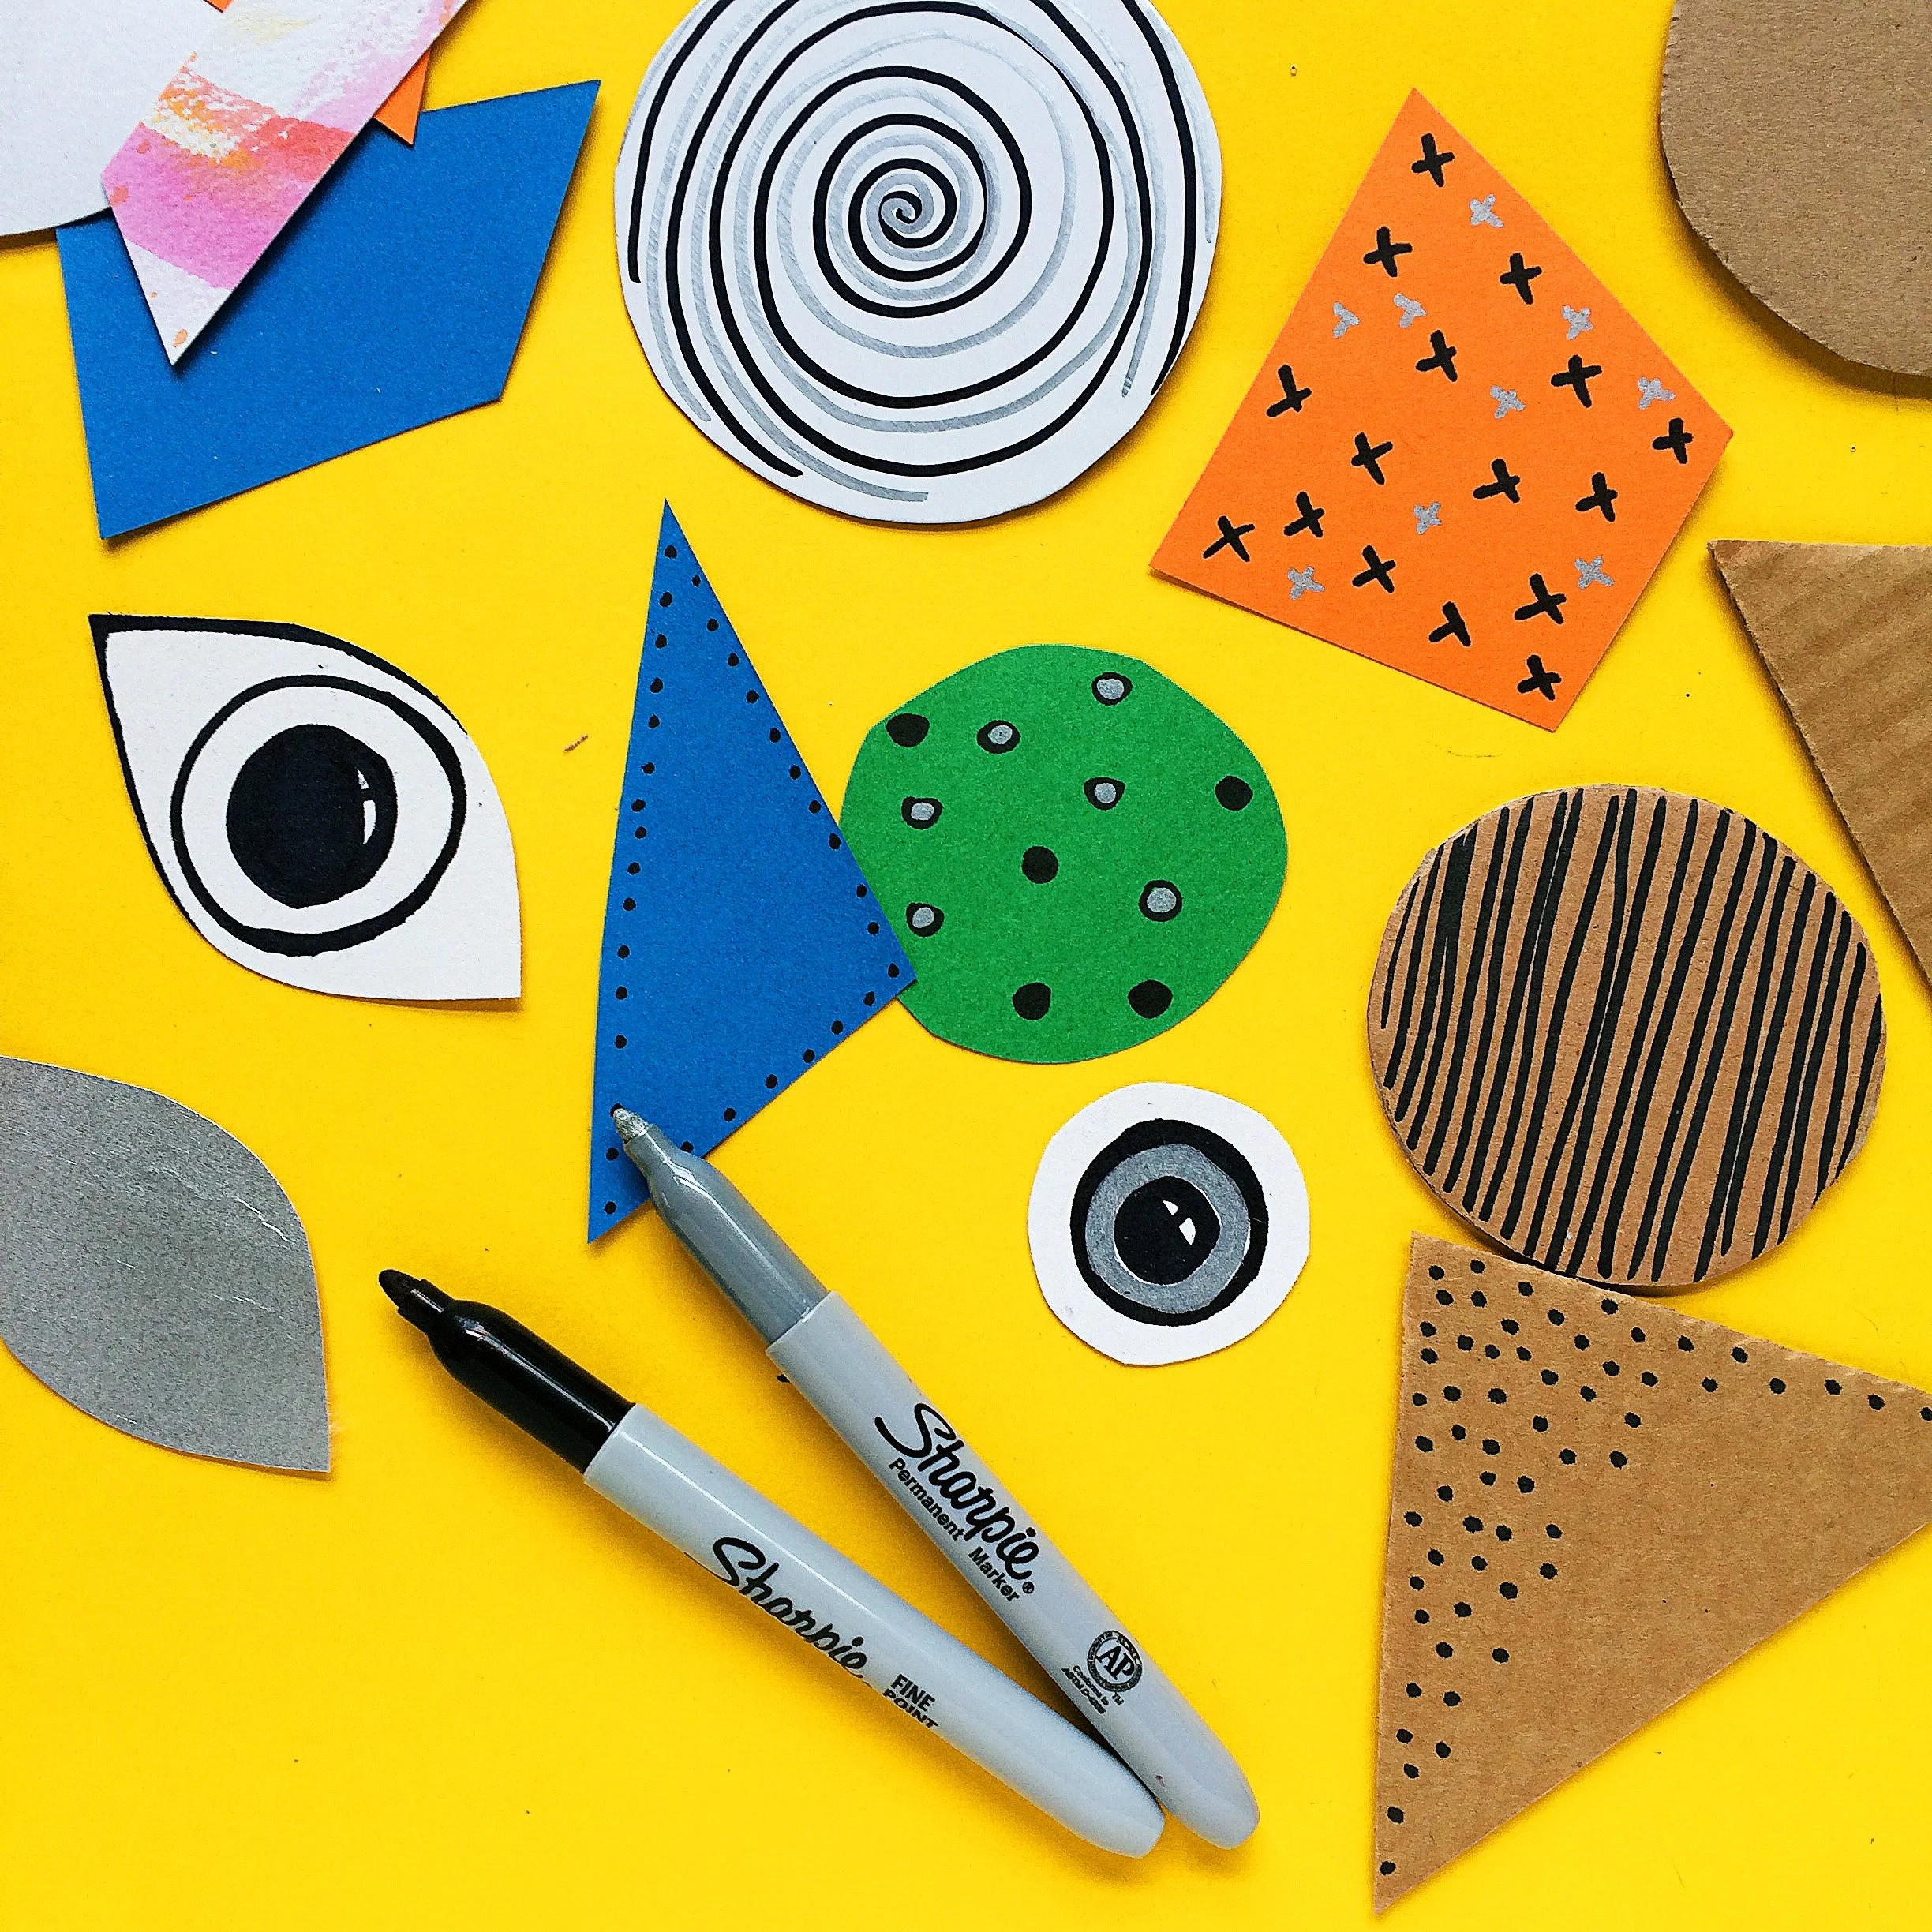
3. Decorate some of the shapes with markers. Try for contrasting patterns that will work when layered up or just let the kids go for it and see what magic happens.

4. Use a 2mm hole punch to punch a small hole in each of the pieces. If you don't have a small punch you can use a sharp knife or scissor blade but this is obviously an adult job.

If you have some of these OTT jewel stickers you might want to stick them to the top of the push pins. This is totally optional but it does add a bit of bling.
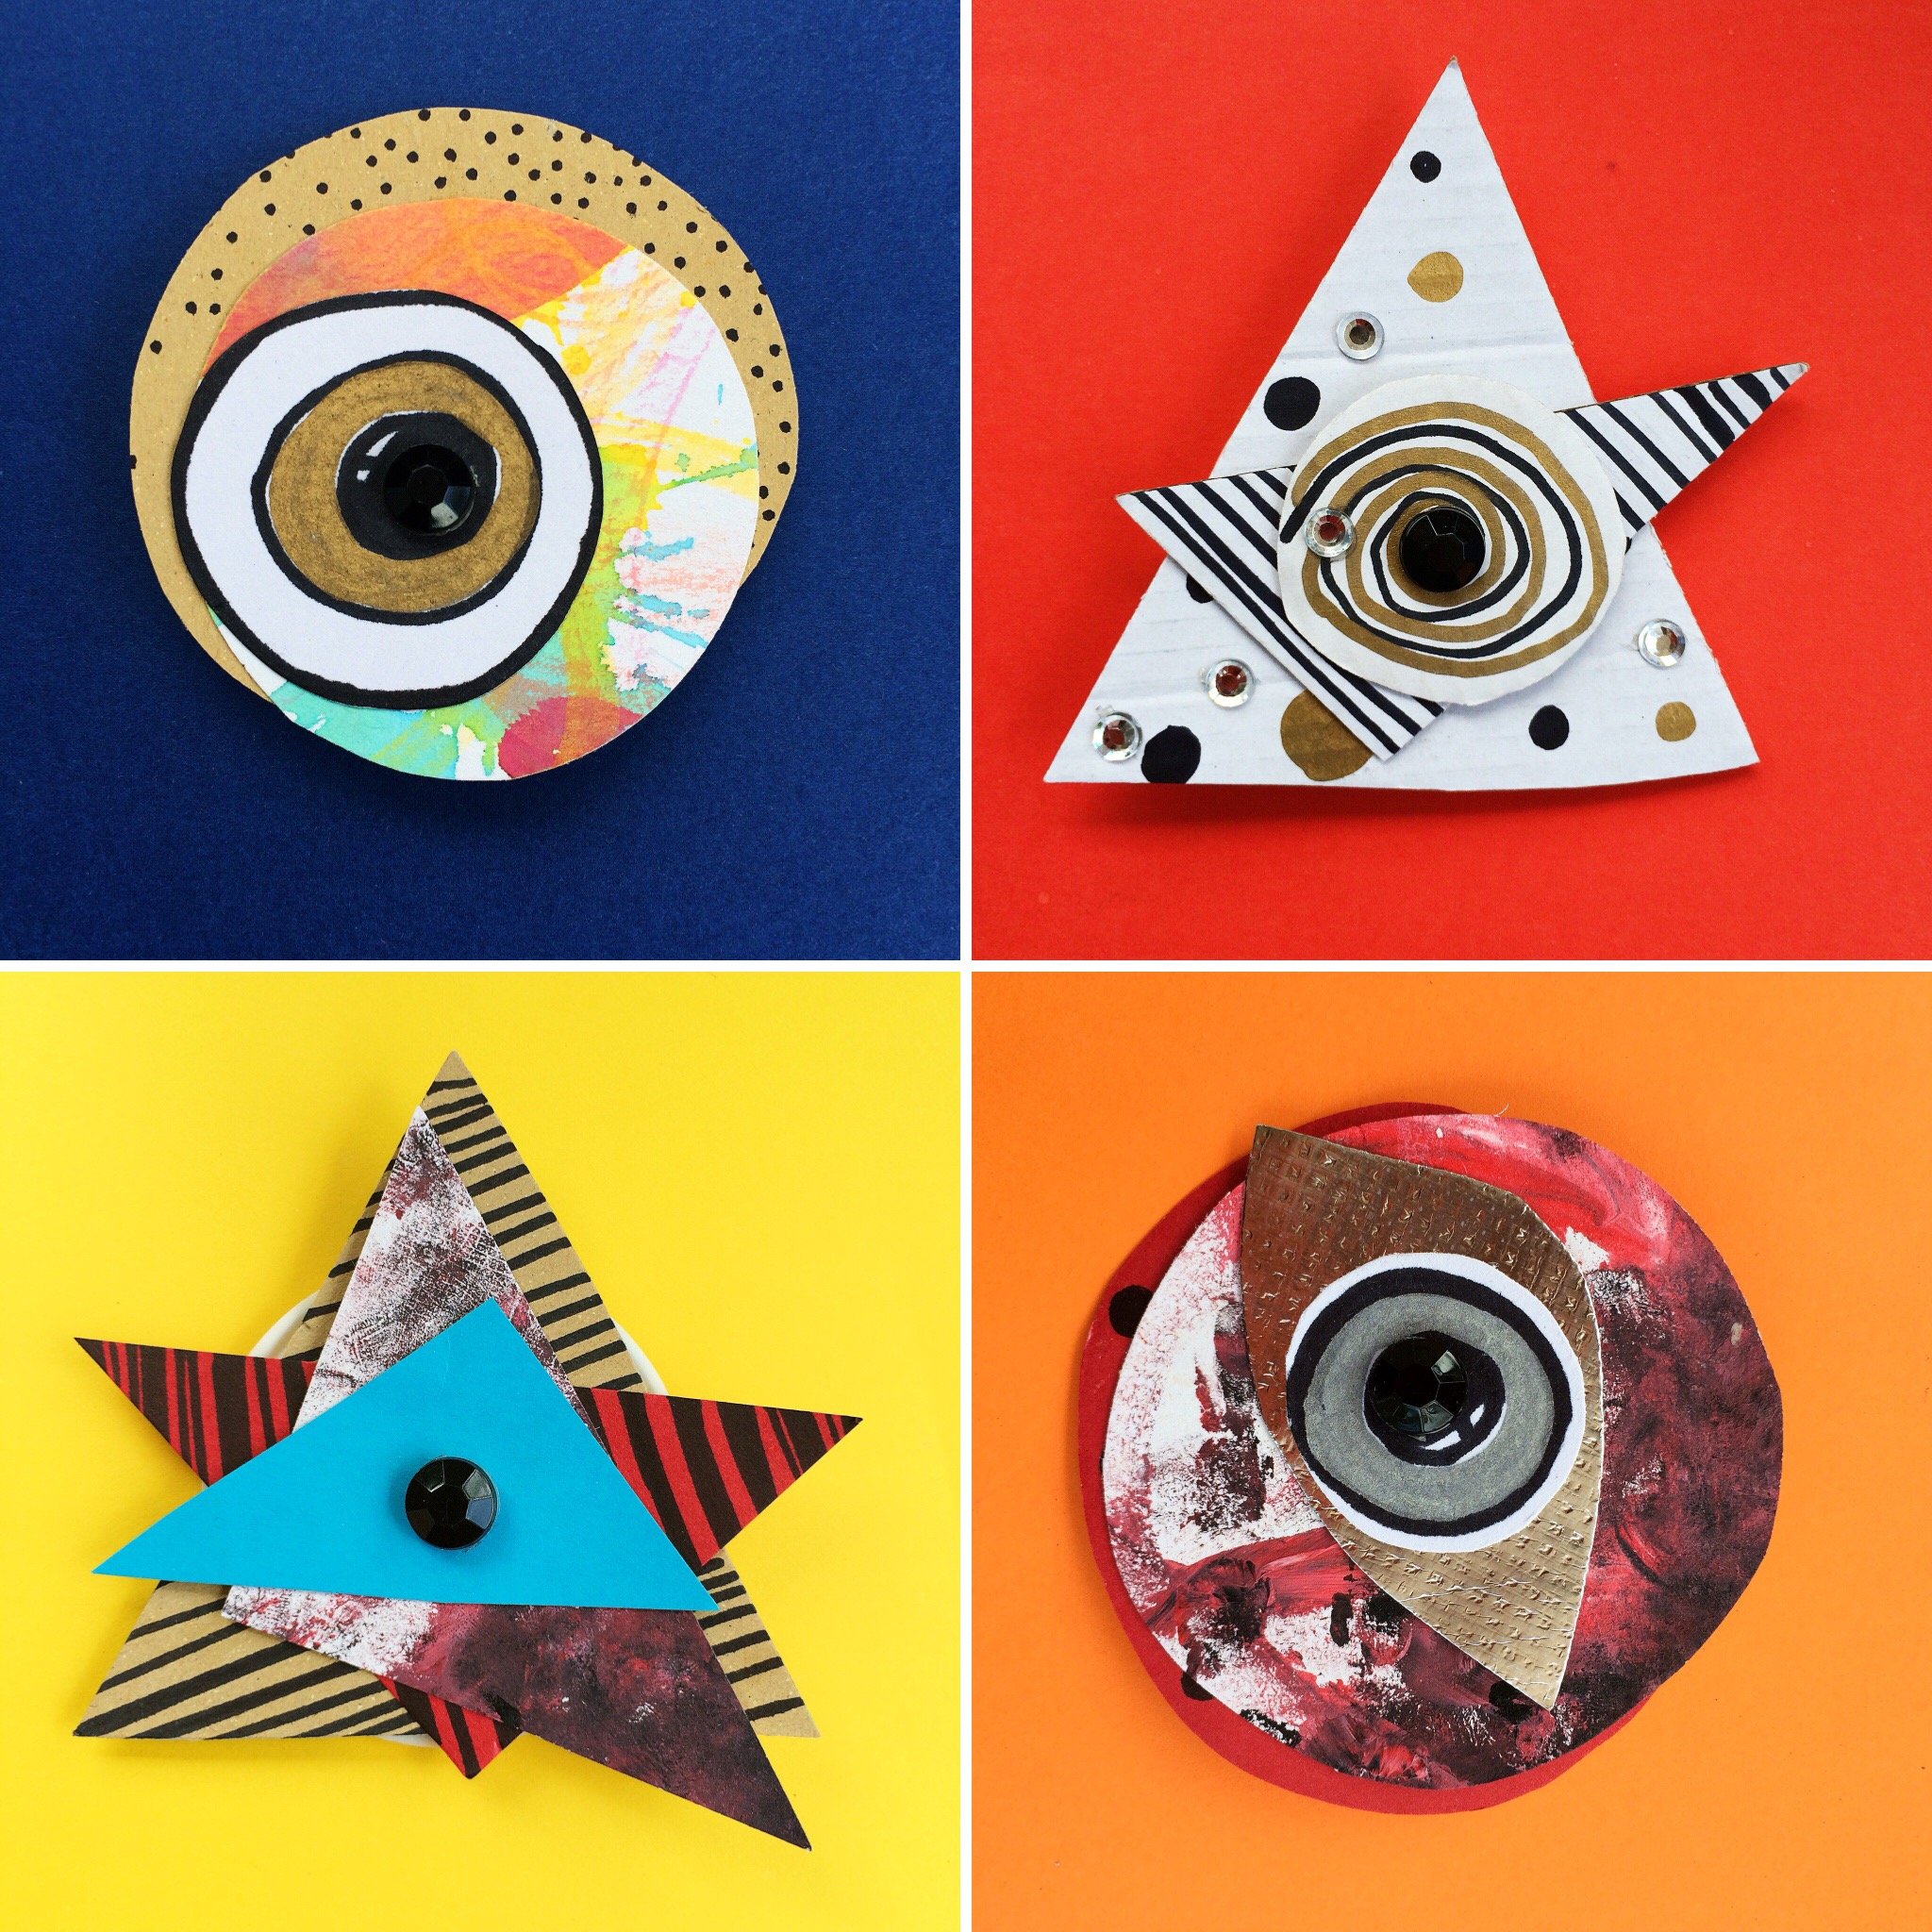
5. Choose a backing piece and 2-3 extra shapes and layer them together. It is fine to try different combinations until you find groupings that work well together. When you are happy with the combinations insert the split pins through all of the layers and then open and fasten at the back.
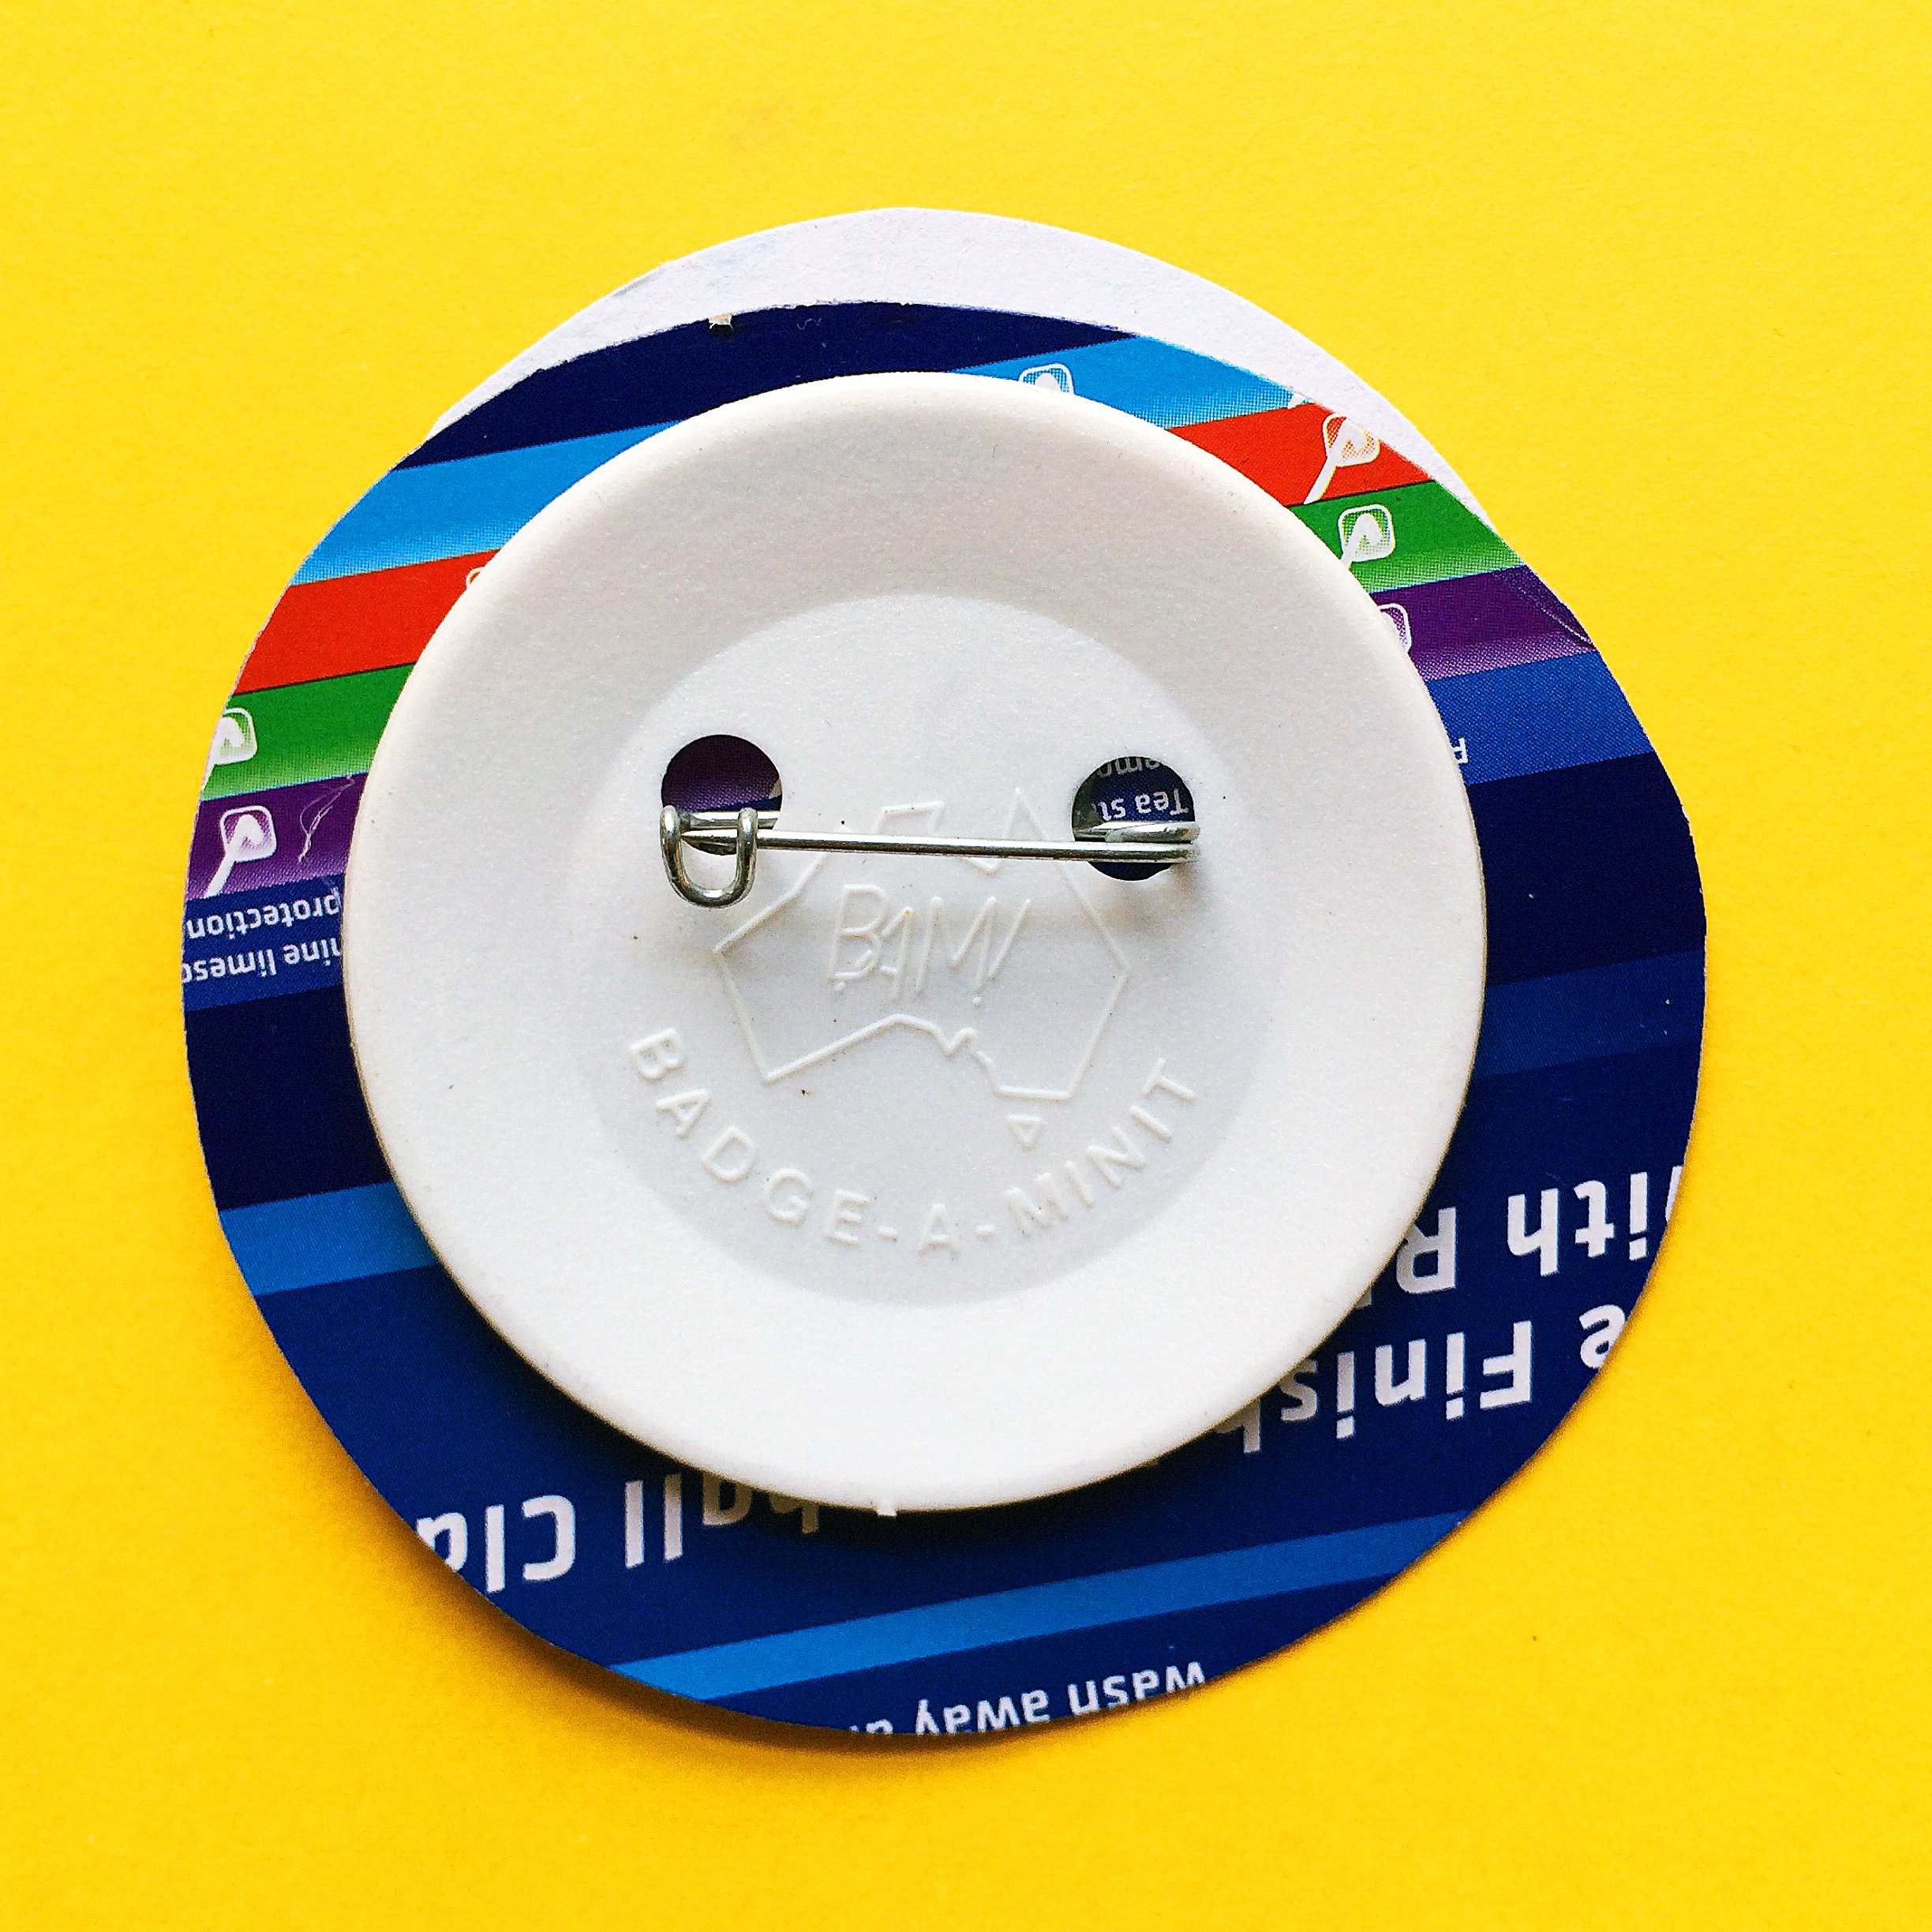
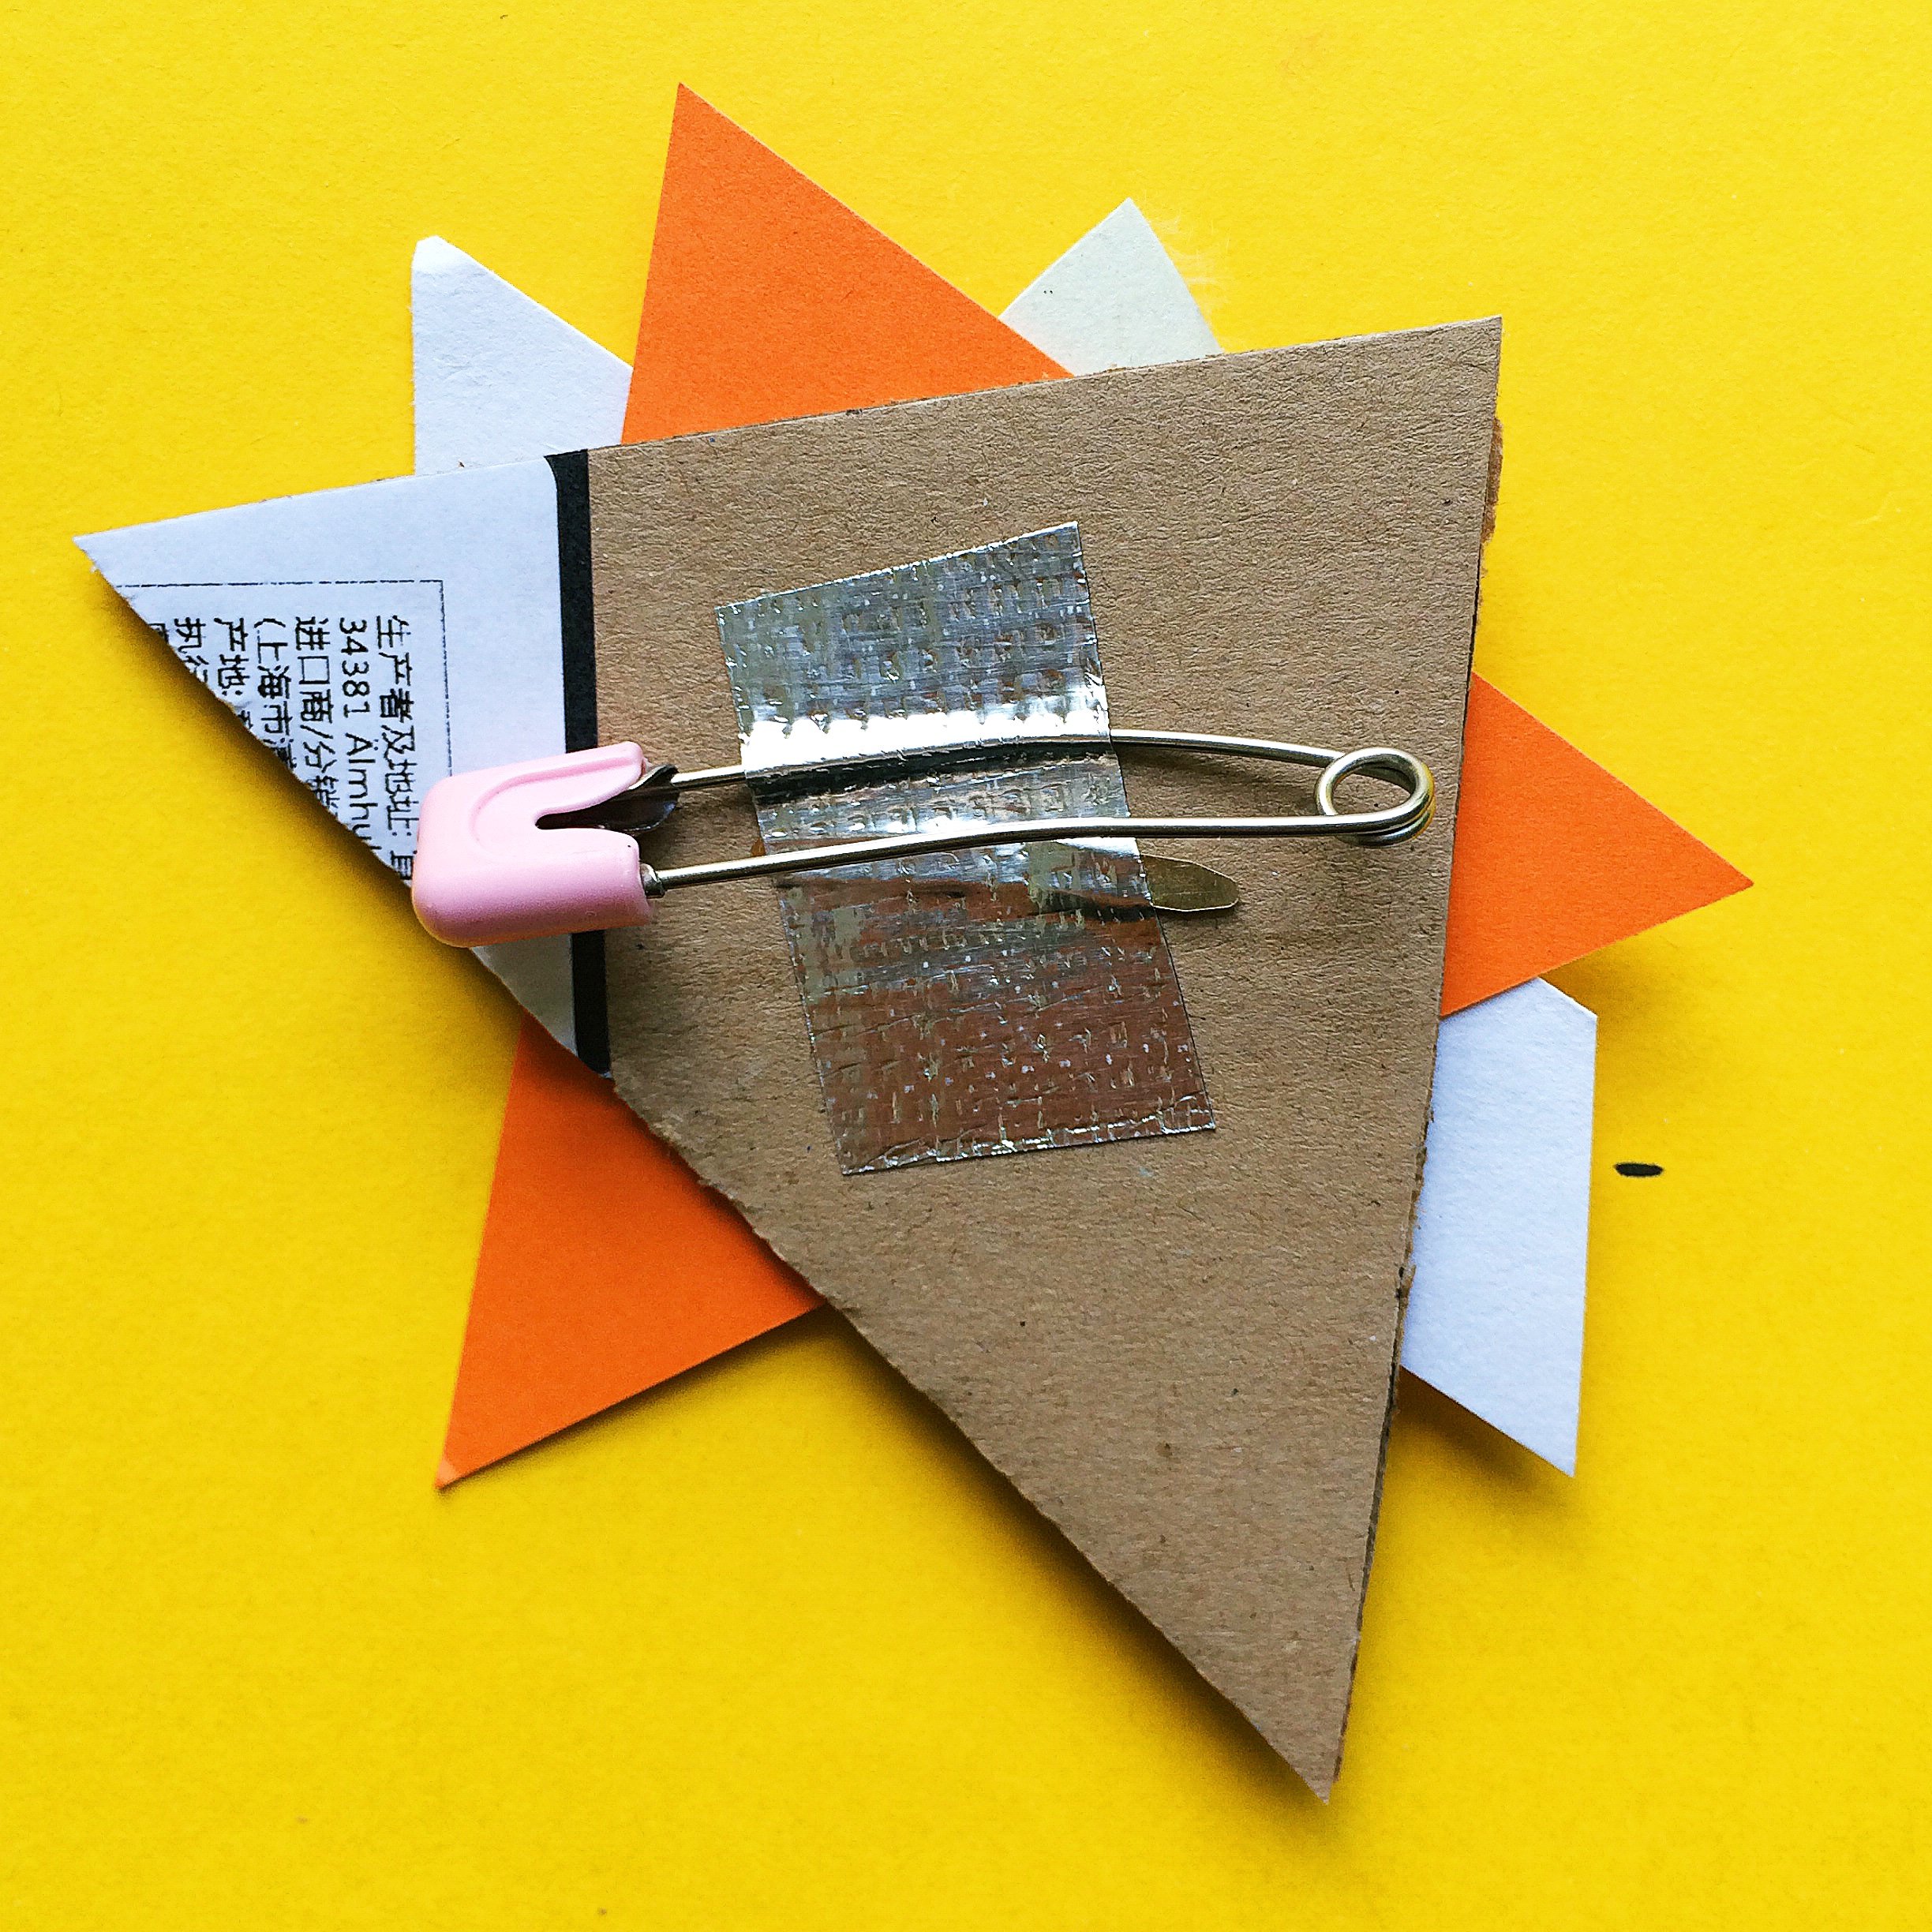
6. Last step is to attach the pins. I had some of these circular brooch backs lying around but you can really use anything you like here. Brooch backs can normally be bought from art and craft or specialist jewellery supply stores and will need to be attached with strong glue (I used hot glue). If you don't have any though big safety pins work a treat, simply hold in place with some strong tape (I used gaffa tape).
MORE IDEAS.....
How about laminating the pieces before you cut them to make them more long lasting?
or... skip the brooch back and add a piece of string for a scraptastic necklace!
