

DIY

DINO COSTUME
The annual Book Week in Australia is a costume bonanza! For our first-ever Book Week, I got PRETTY excited when Finn came home and actually asked me to make him a costume. His favourite book wasn't really the kind of book I think you’re supposed to pick. It's not a story, just a slim illustrated dinosaur booklet that came with a make-your-own dino kit. Who cares, he asked for a Dino and he got a Dino...
The best thing about this costume is that is costs under $15 and takes under an hour to make. WINNER!
Now, I should mention here that I realised (after I had proudly taken the first batch of photos) that I had forgotten to make a tail #rookiemistake. Luckily, we had one in our costume box so I added this to our costume before the big day along with a few small adjustments to the costume to make it blend in. As a result this tutorial doesn't include a tail but you could either leave it out and hope no one notices, or buy or make one pretty cheaply.


WHAT YOU NEED:
A large shoe box
A smaller box
Some big lids
Spray paint (optional)
Brown and green paint
Green clothes (we got ours from Kmart)
Brown felt
Hot glue
Two short but thick screws or bolts (optional but helps to reinforce the head)
HOW TO MAKE:
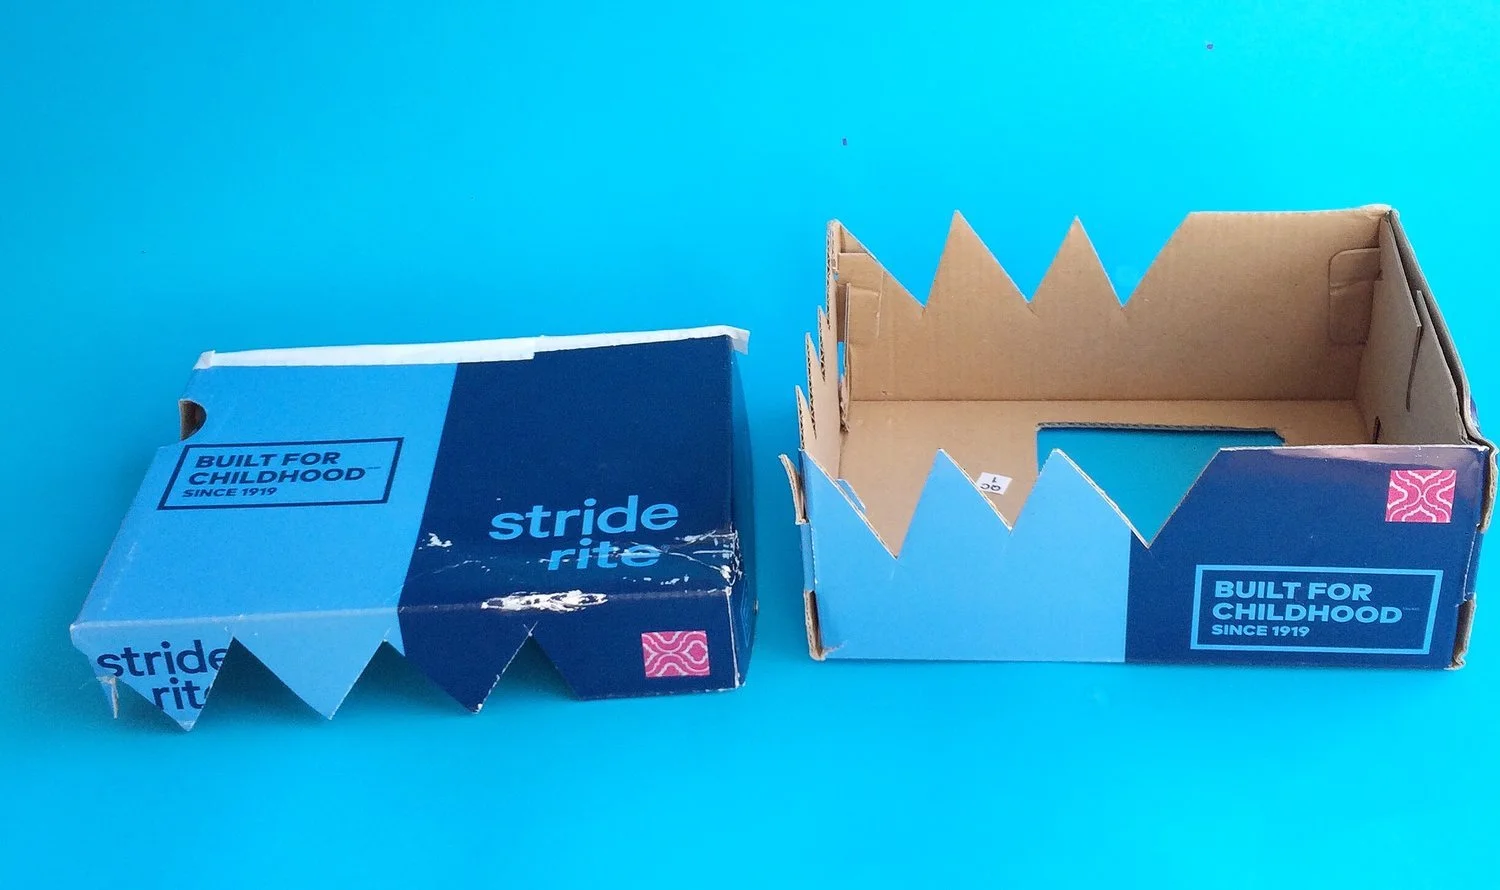
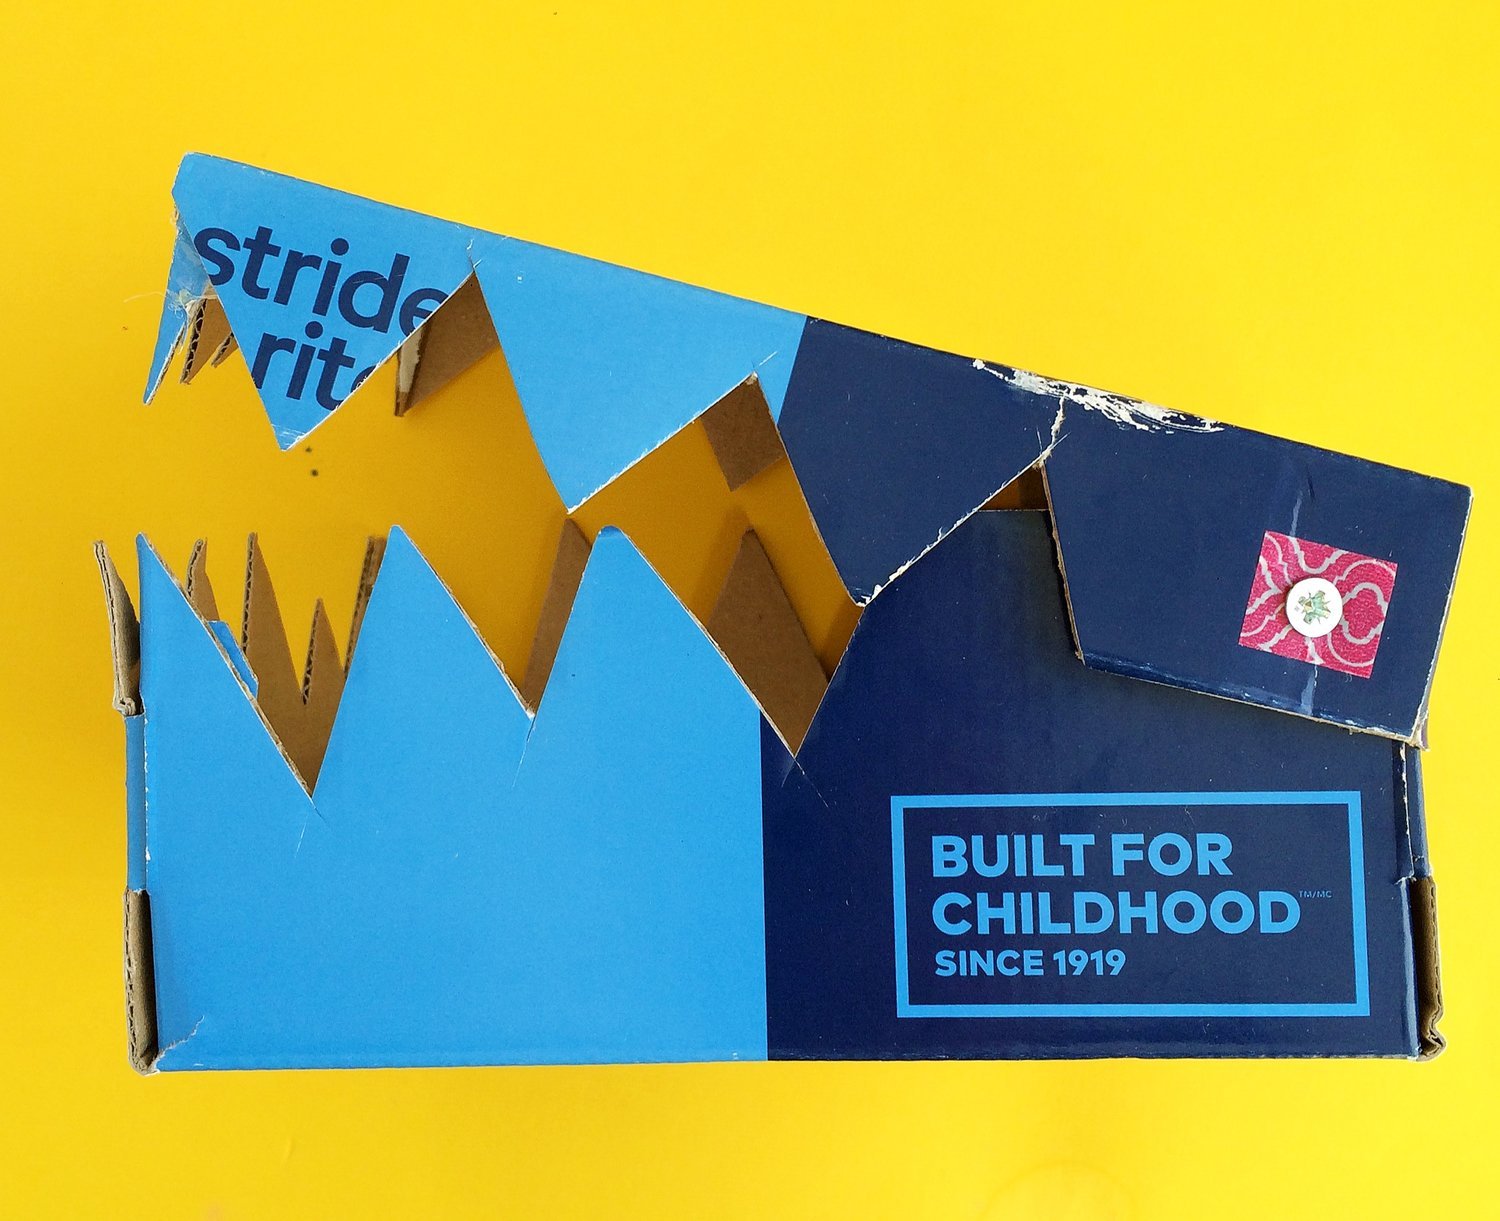
Cut out sharp teeth on three sides of both pieces of your box. Don't cut the teeth all the way down the sides as you will need some space to attach the 'jaw' together. Sometimes boxes can be a bit funny when you start opening them up. If your box starts to fall apart on you just reinforce it with some glue.
1.
2.
Cut a hole in the base of the box, big enough to fit your child's head through.
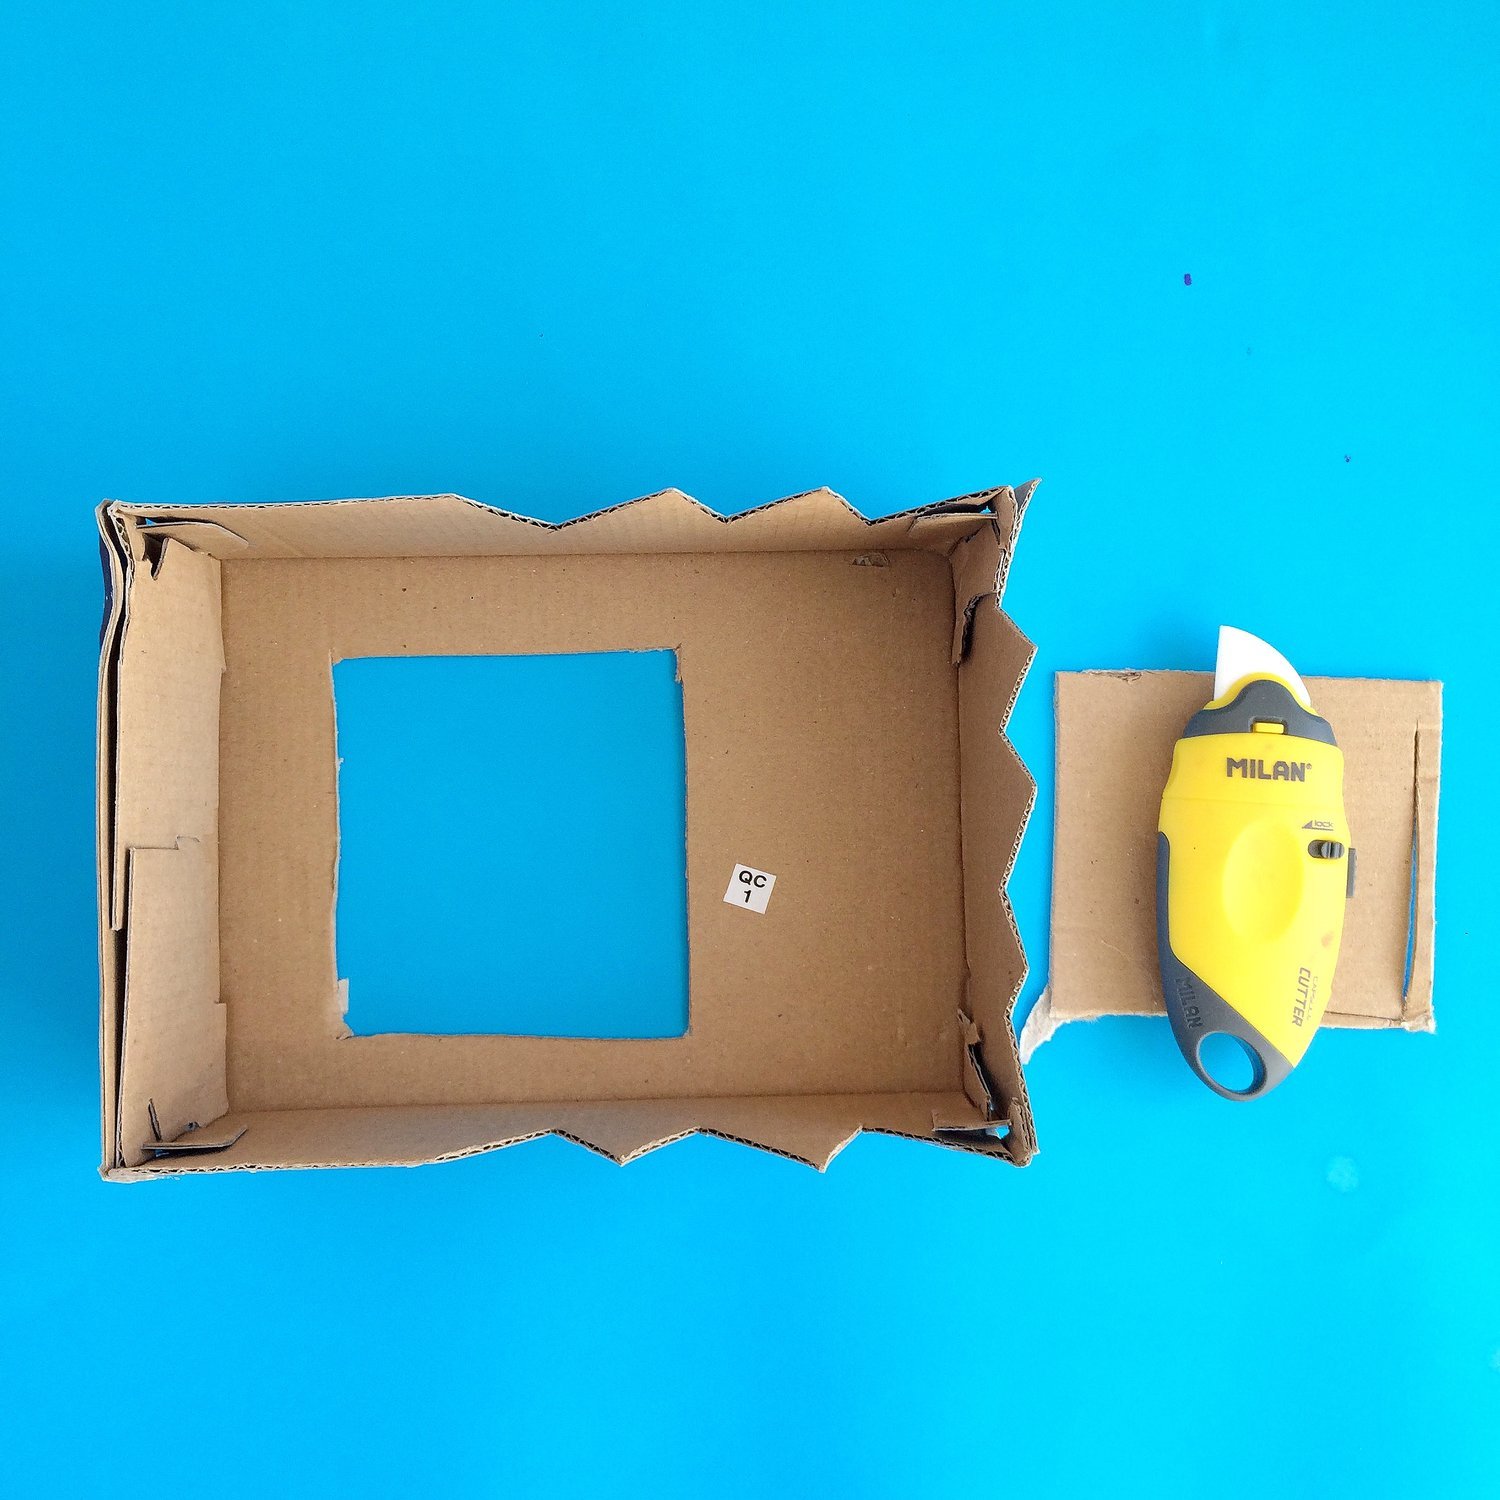
Make some small holes in your box pieces where I have placed the red stickers on the picture. Don't make the holes too big as you want the screws to be a nice tight fit. Put the pieces on top of each other, being careful to line up the holes. You may need to adjust your holes a bit if they don't line up. Insert a small screw in each of the holes then reinforce with hot glue.
3.

Glue a smaller box on top to finish your head.
4.
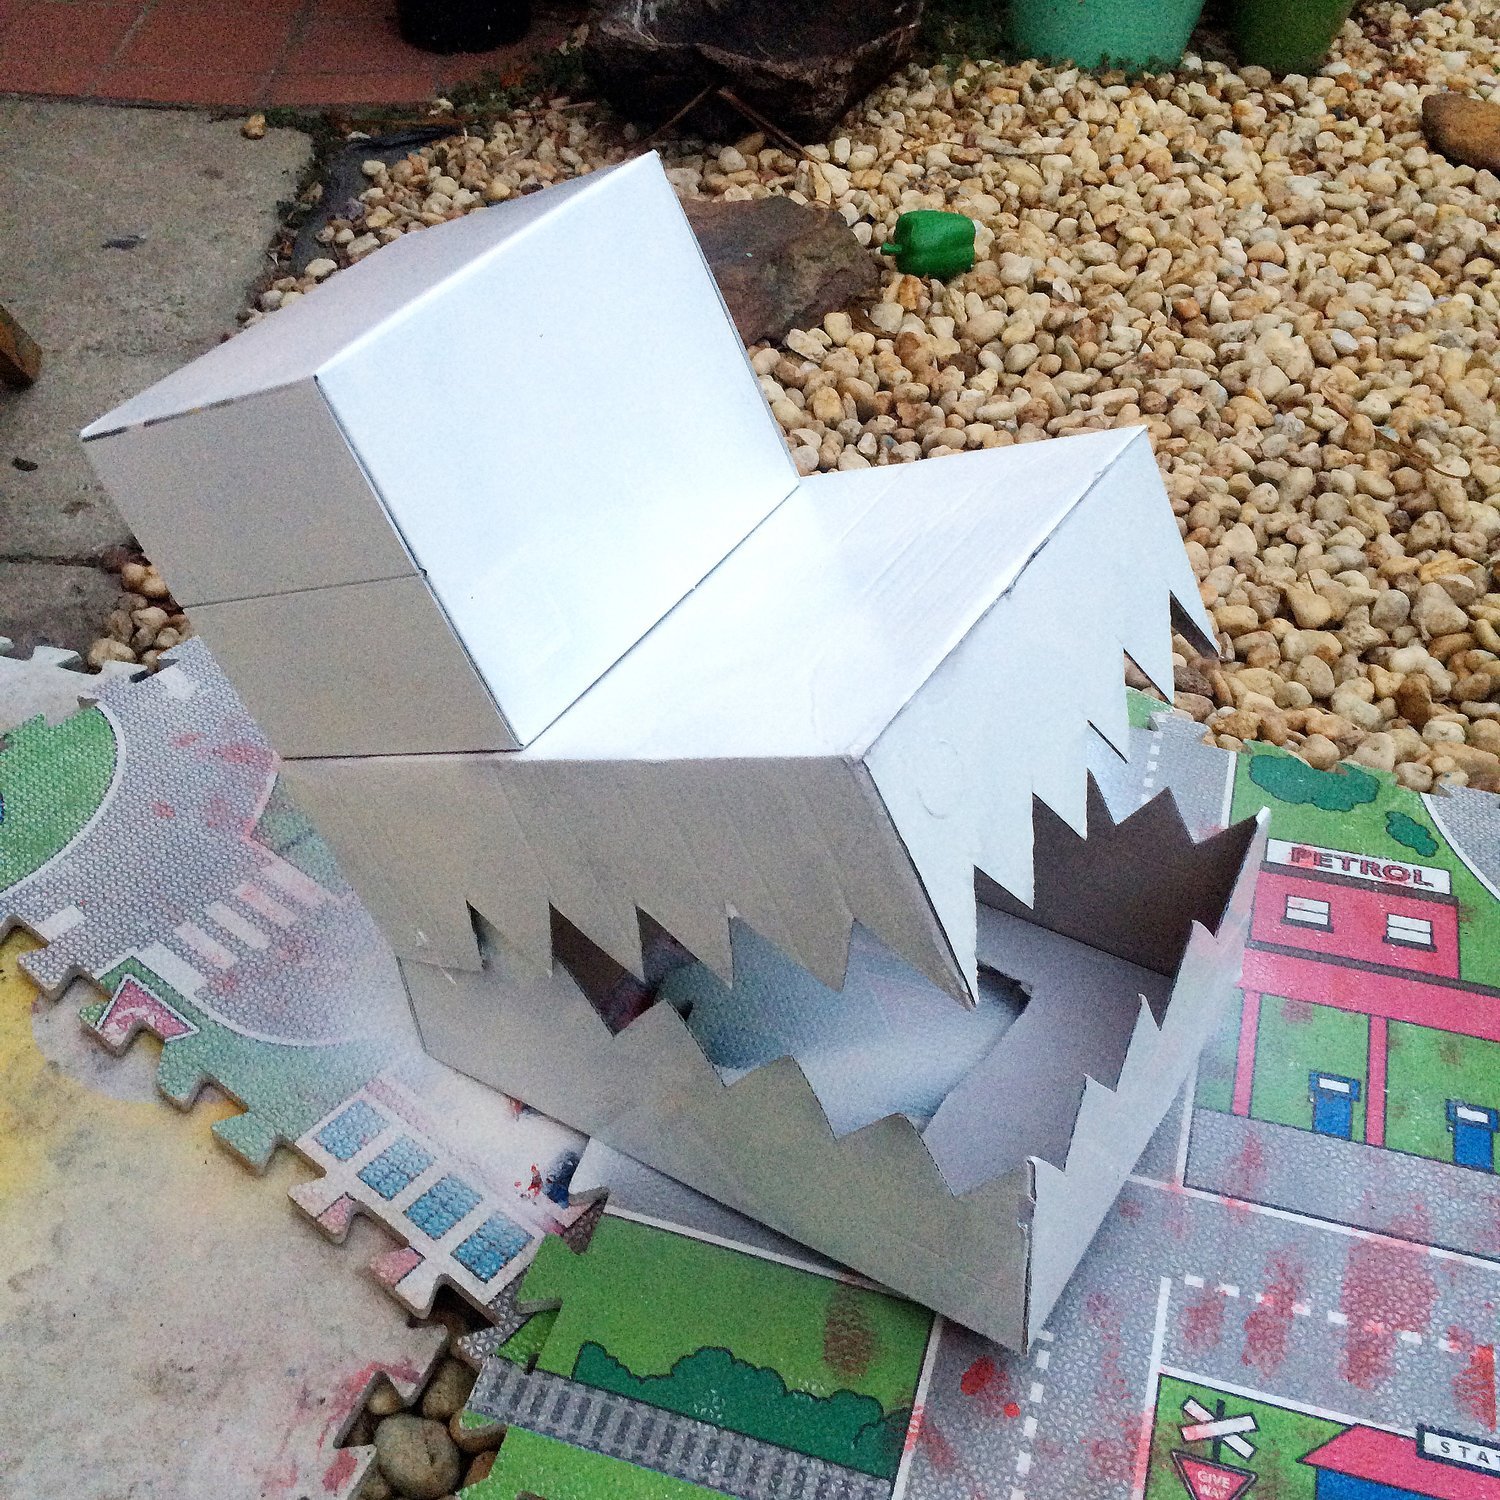
To make an even base to paint on, spray paint your dino head white.
5.
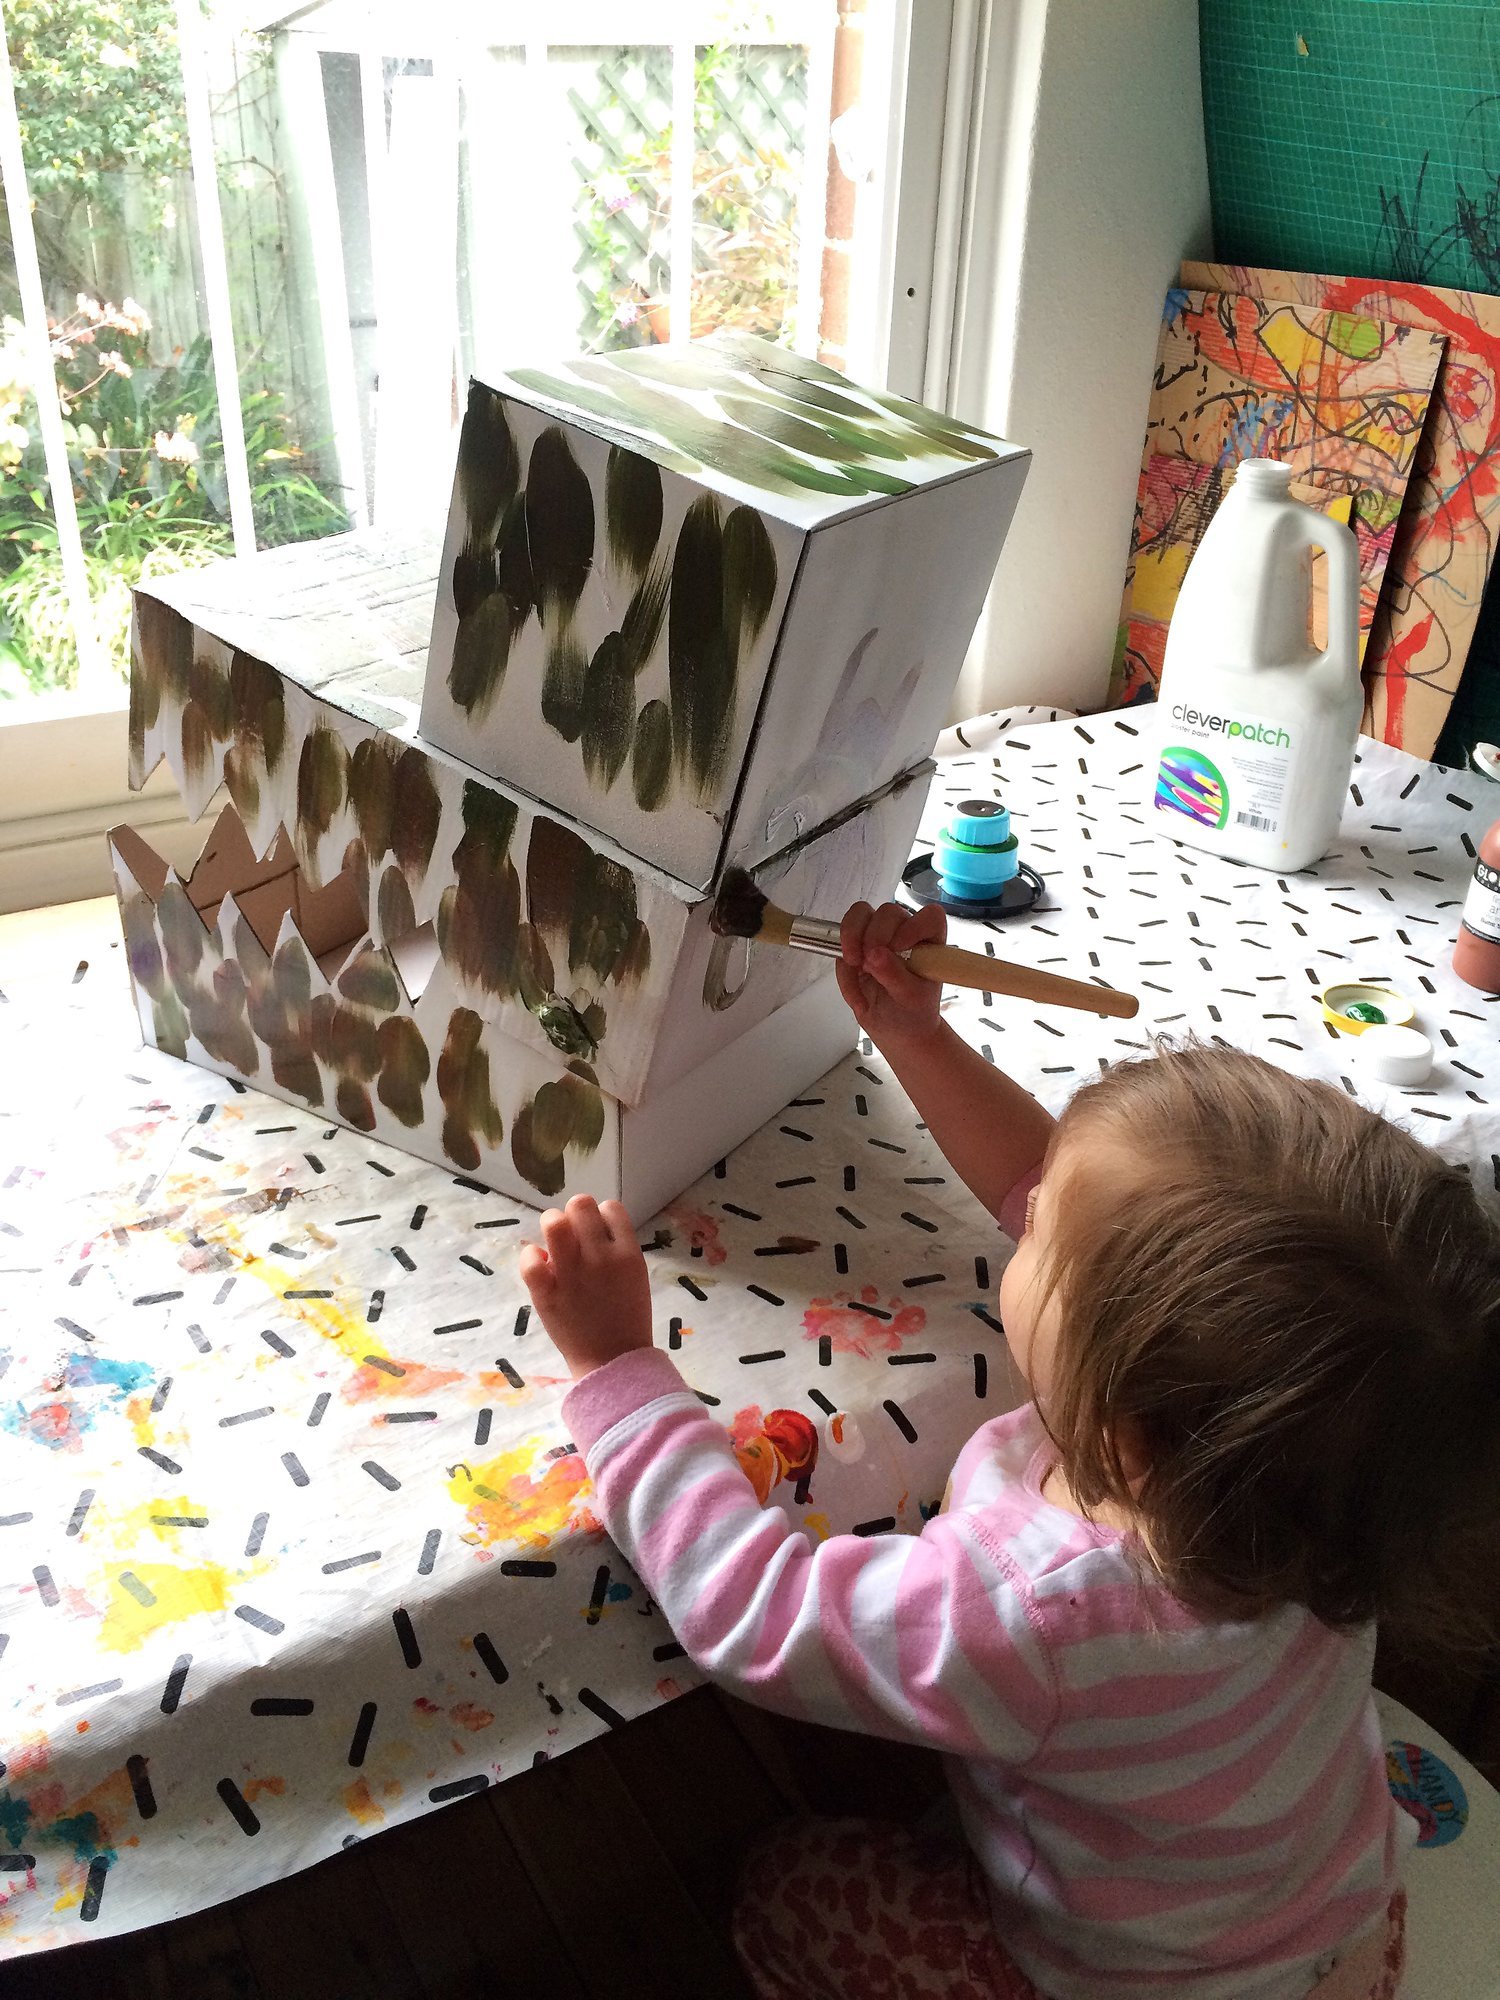
Ask your studio assistant to help you paint green and brown.
6.
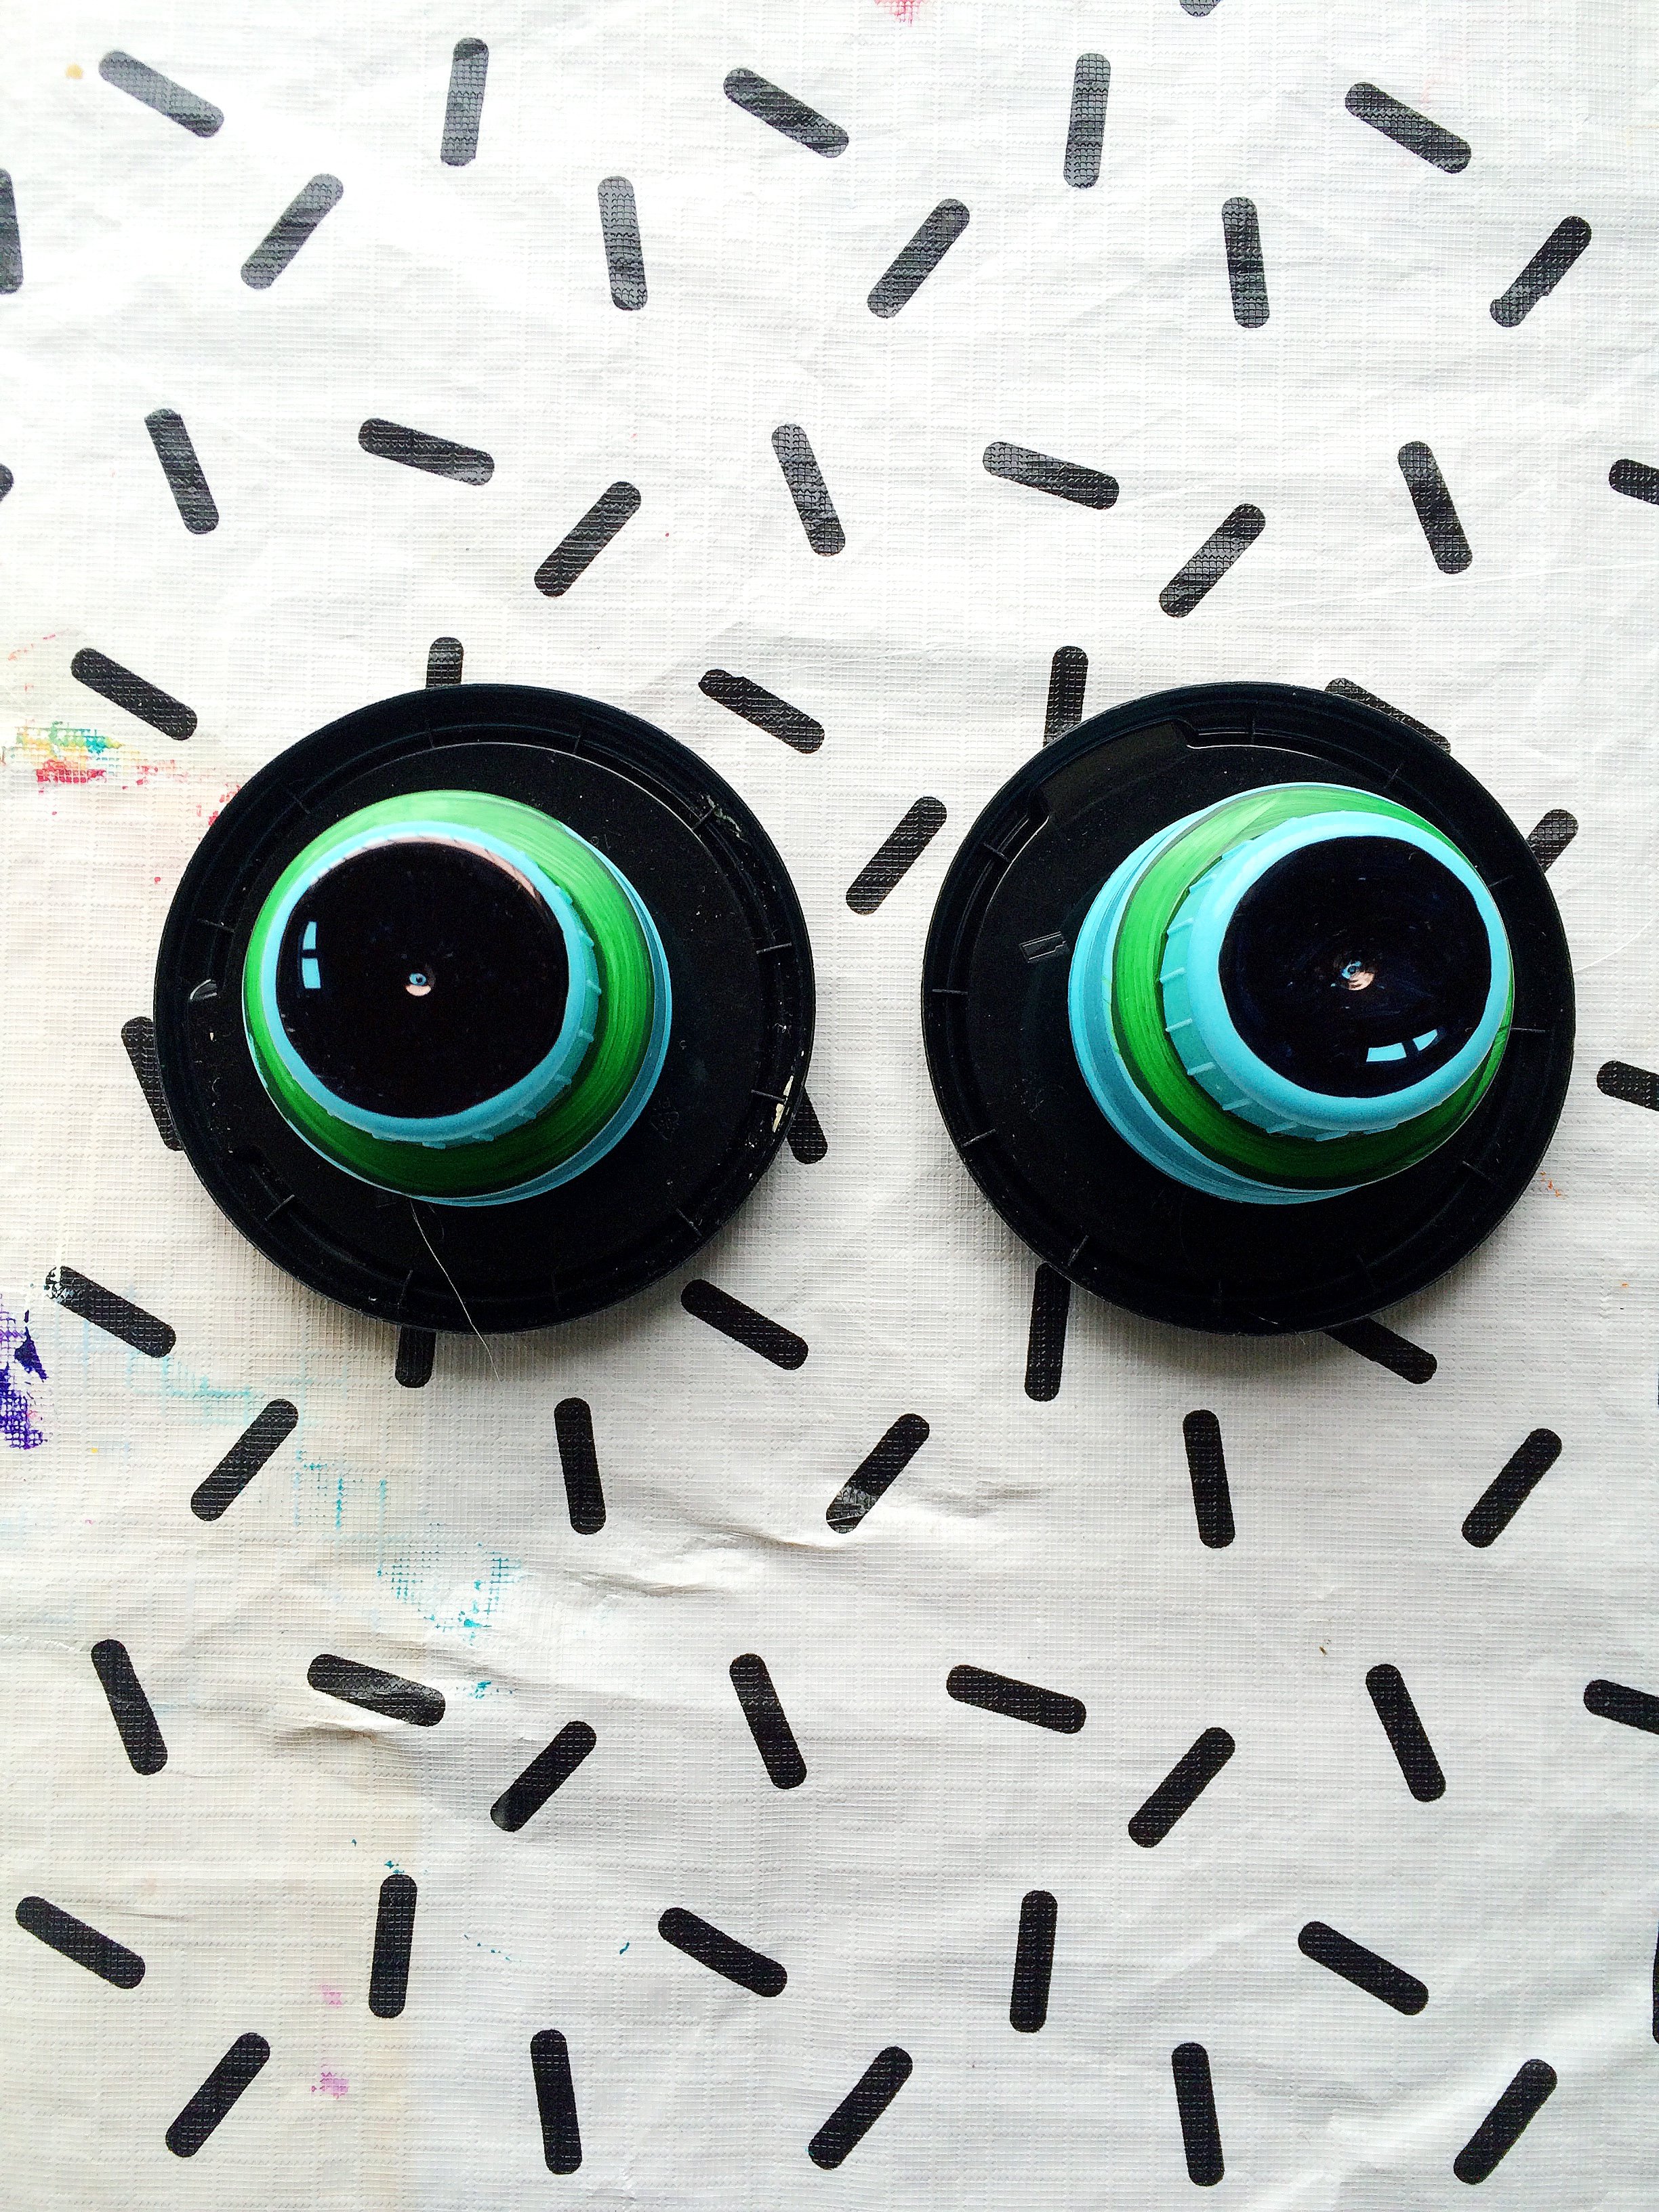
Make some eyes by gluing together some big lids. You can paint these or just leave them as it. You could also make these out of cardboard or just paint directly onto the box. Glue these onto your dino head once it’s dry.
7.
THE CLOTHES:
Go out and buy the cheapest green or brown clothes you can find or even better, find some old clothes at home that you are not wearing any more. We managed to find a t-shirt and pants for $9 from Kmart.
1.

Cut out some brown felt shapes and glue them all over your top and pants. Next, mix up some brown and green paint and apply this in blotches around your triangles.
2.

Congratulations!
You just made a dinosaur!!!
But wait I hear you say, where is the tail?? Well, to be perfectly honest we forgot to make one, but luckily we had one already in our dress-up box. To make the tail look like part of the costume we added in some yellow triangles to the overall design

Menu
Social
Let’s stay connected
Reach out about a project, collaboration or just to say hello!

