

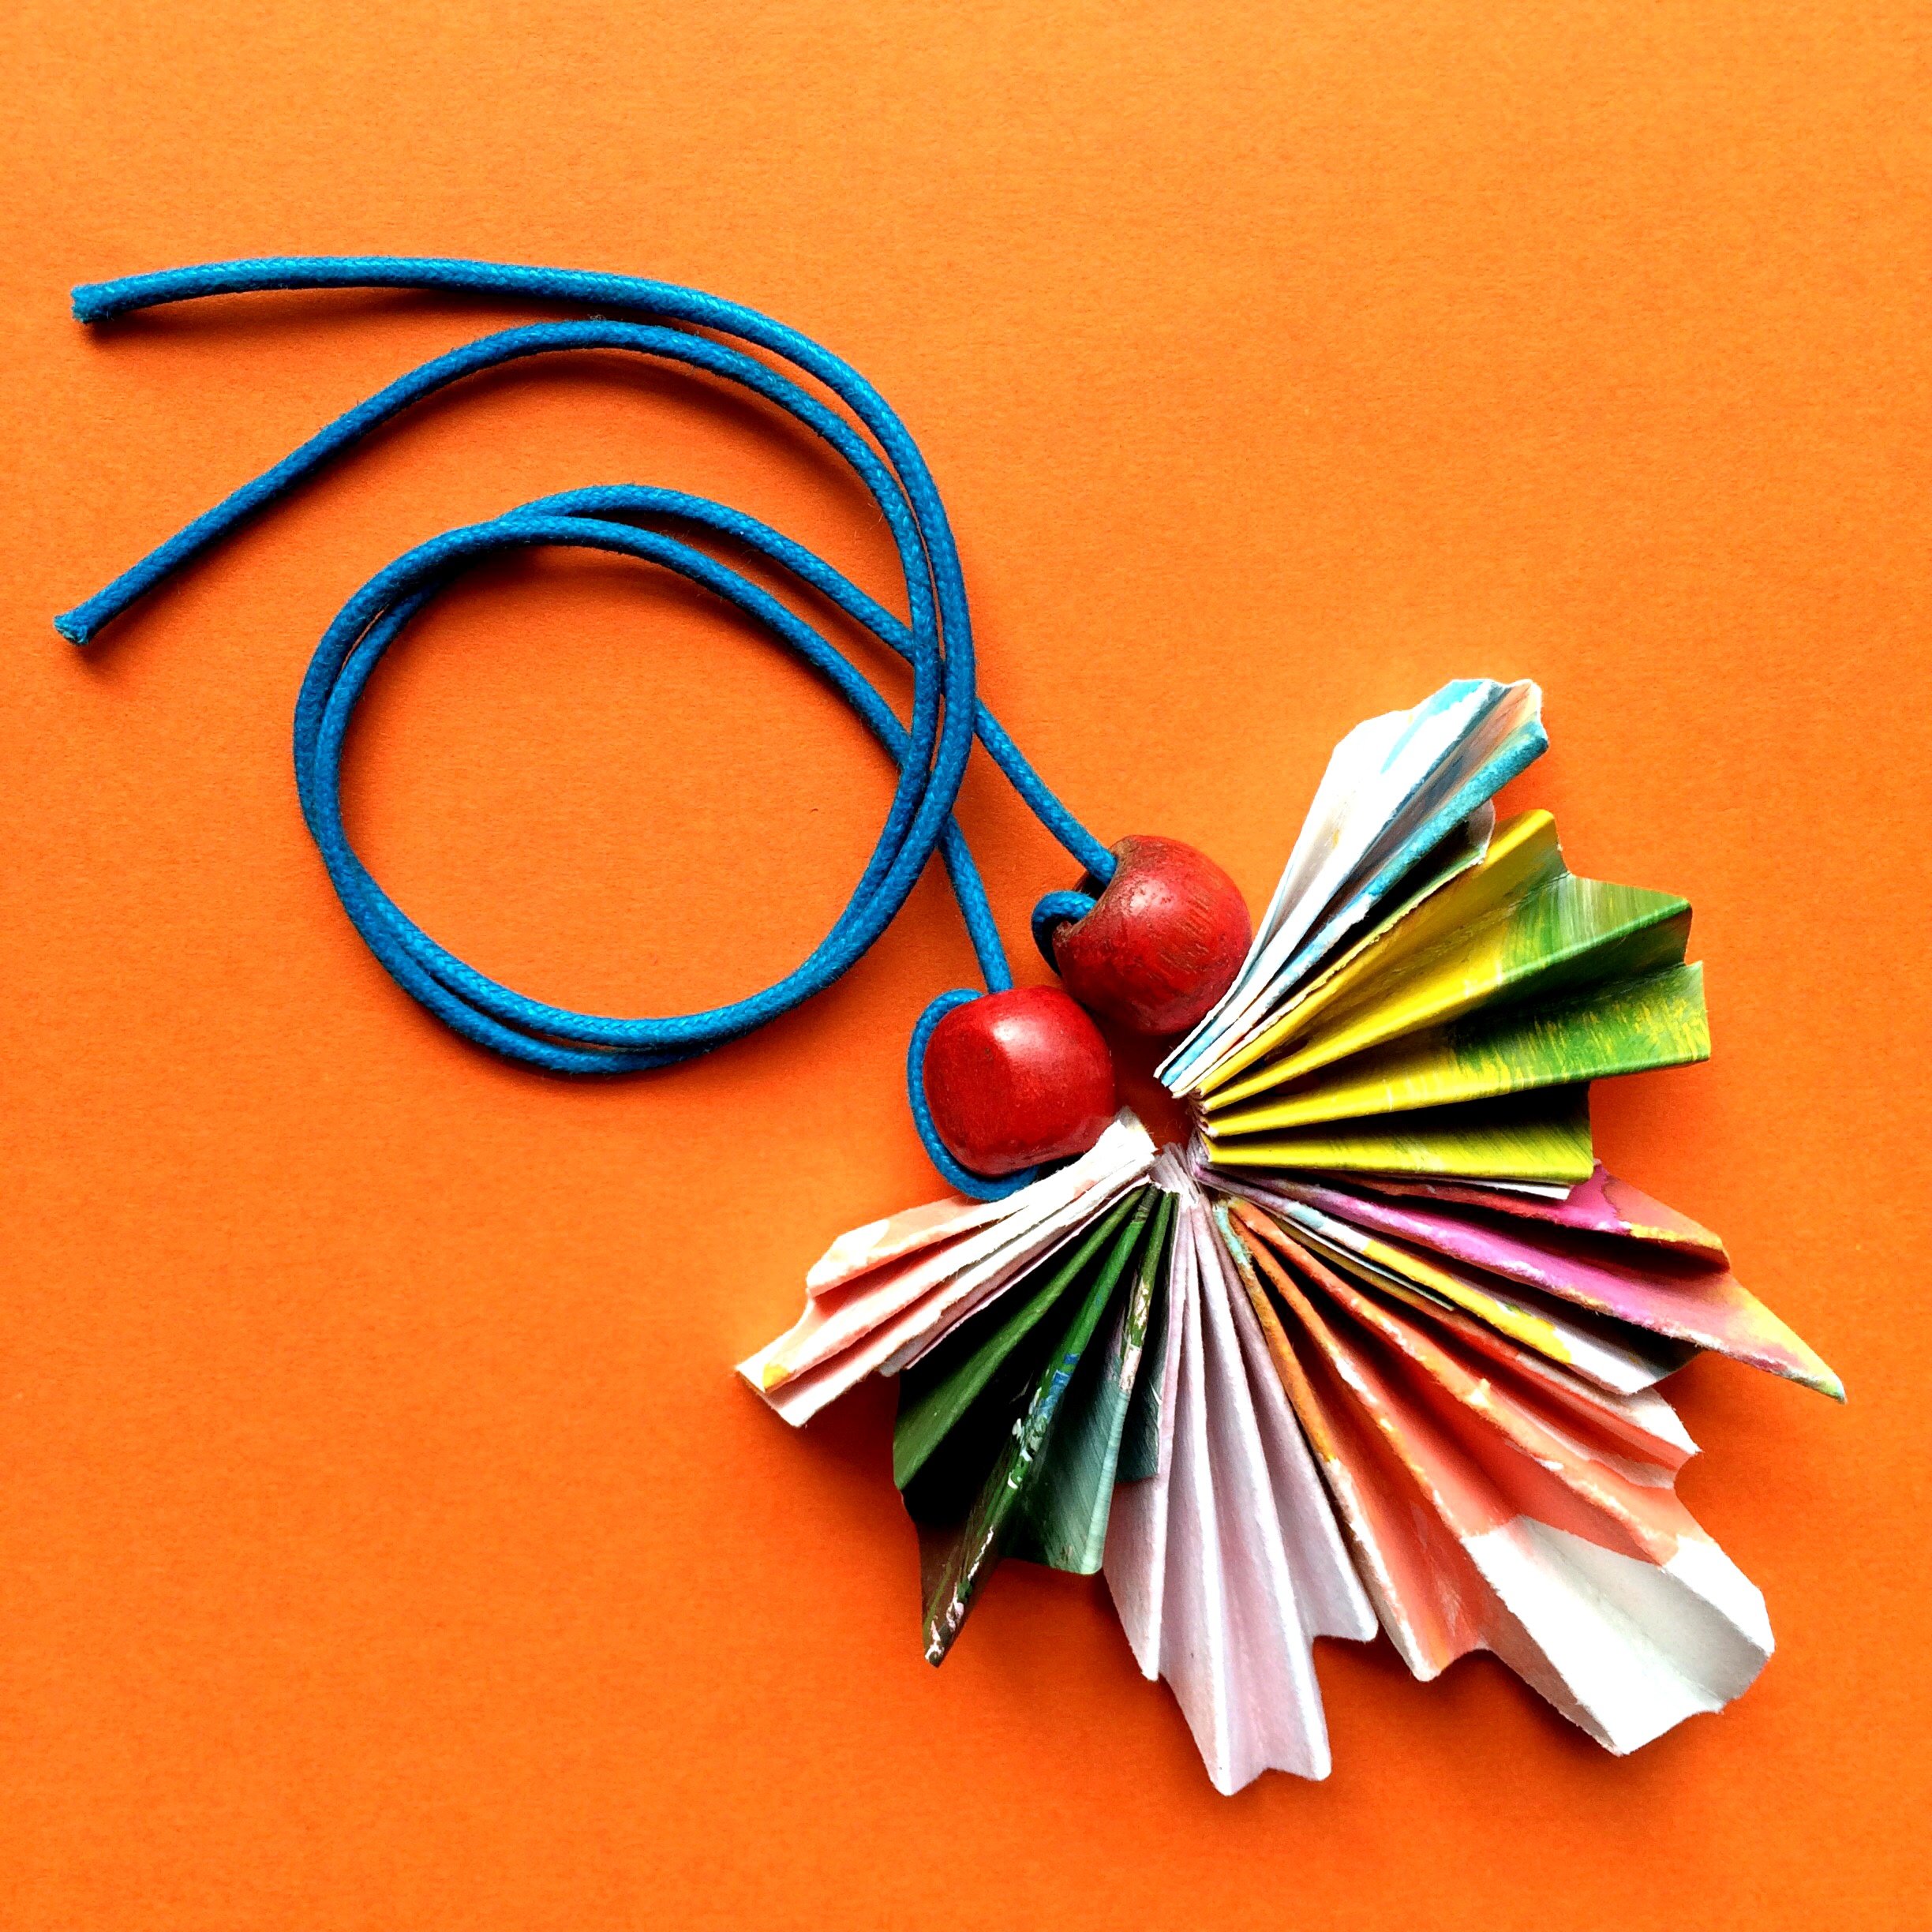
Art Paper necklace
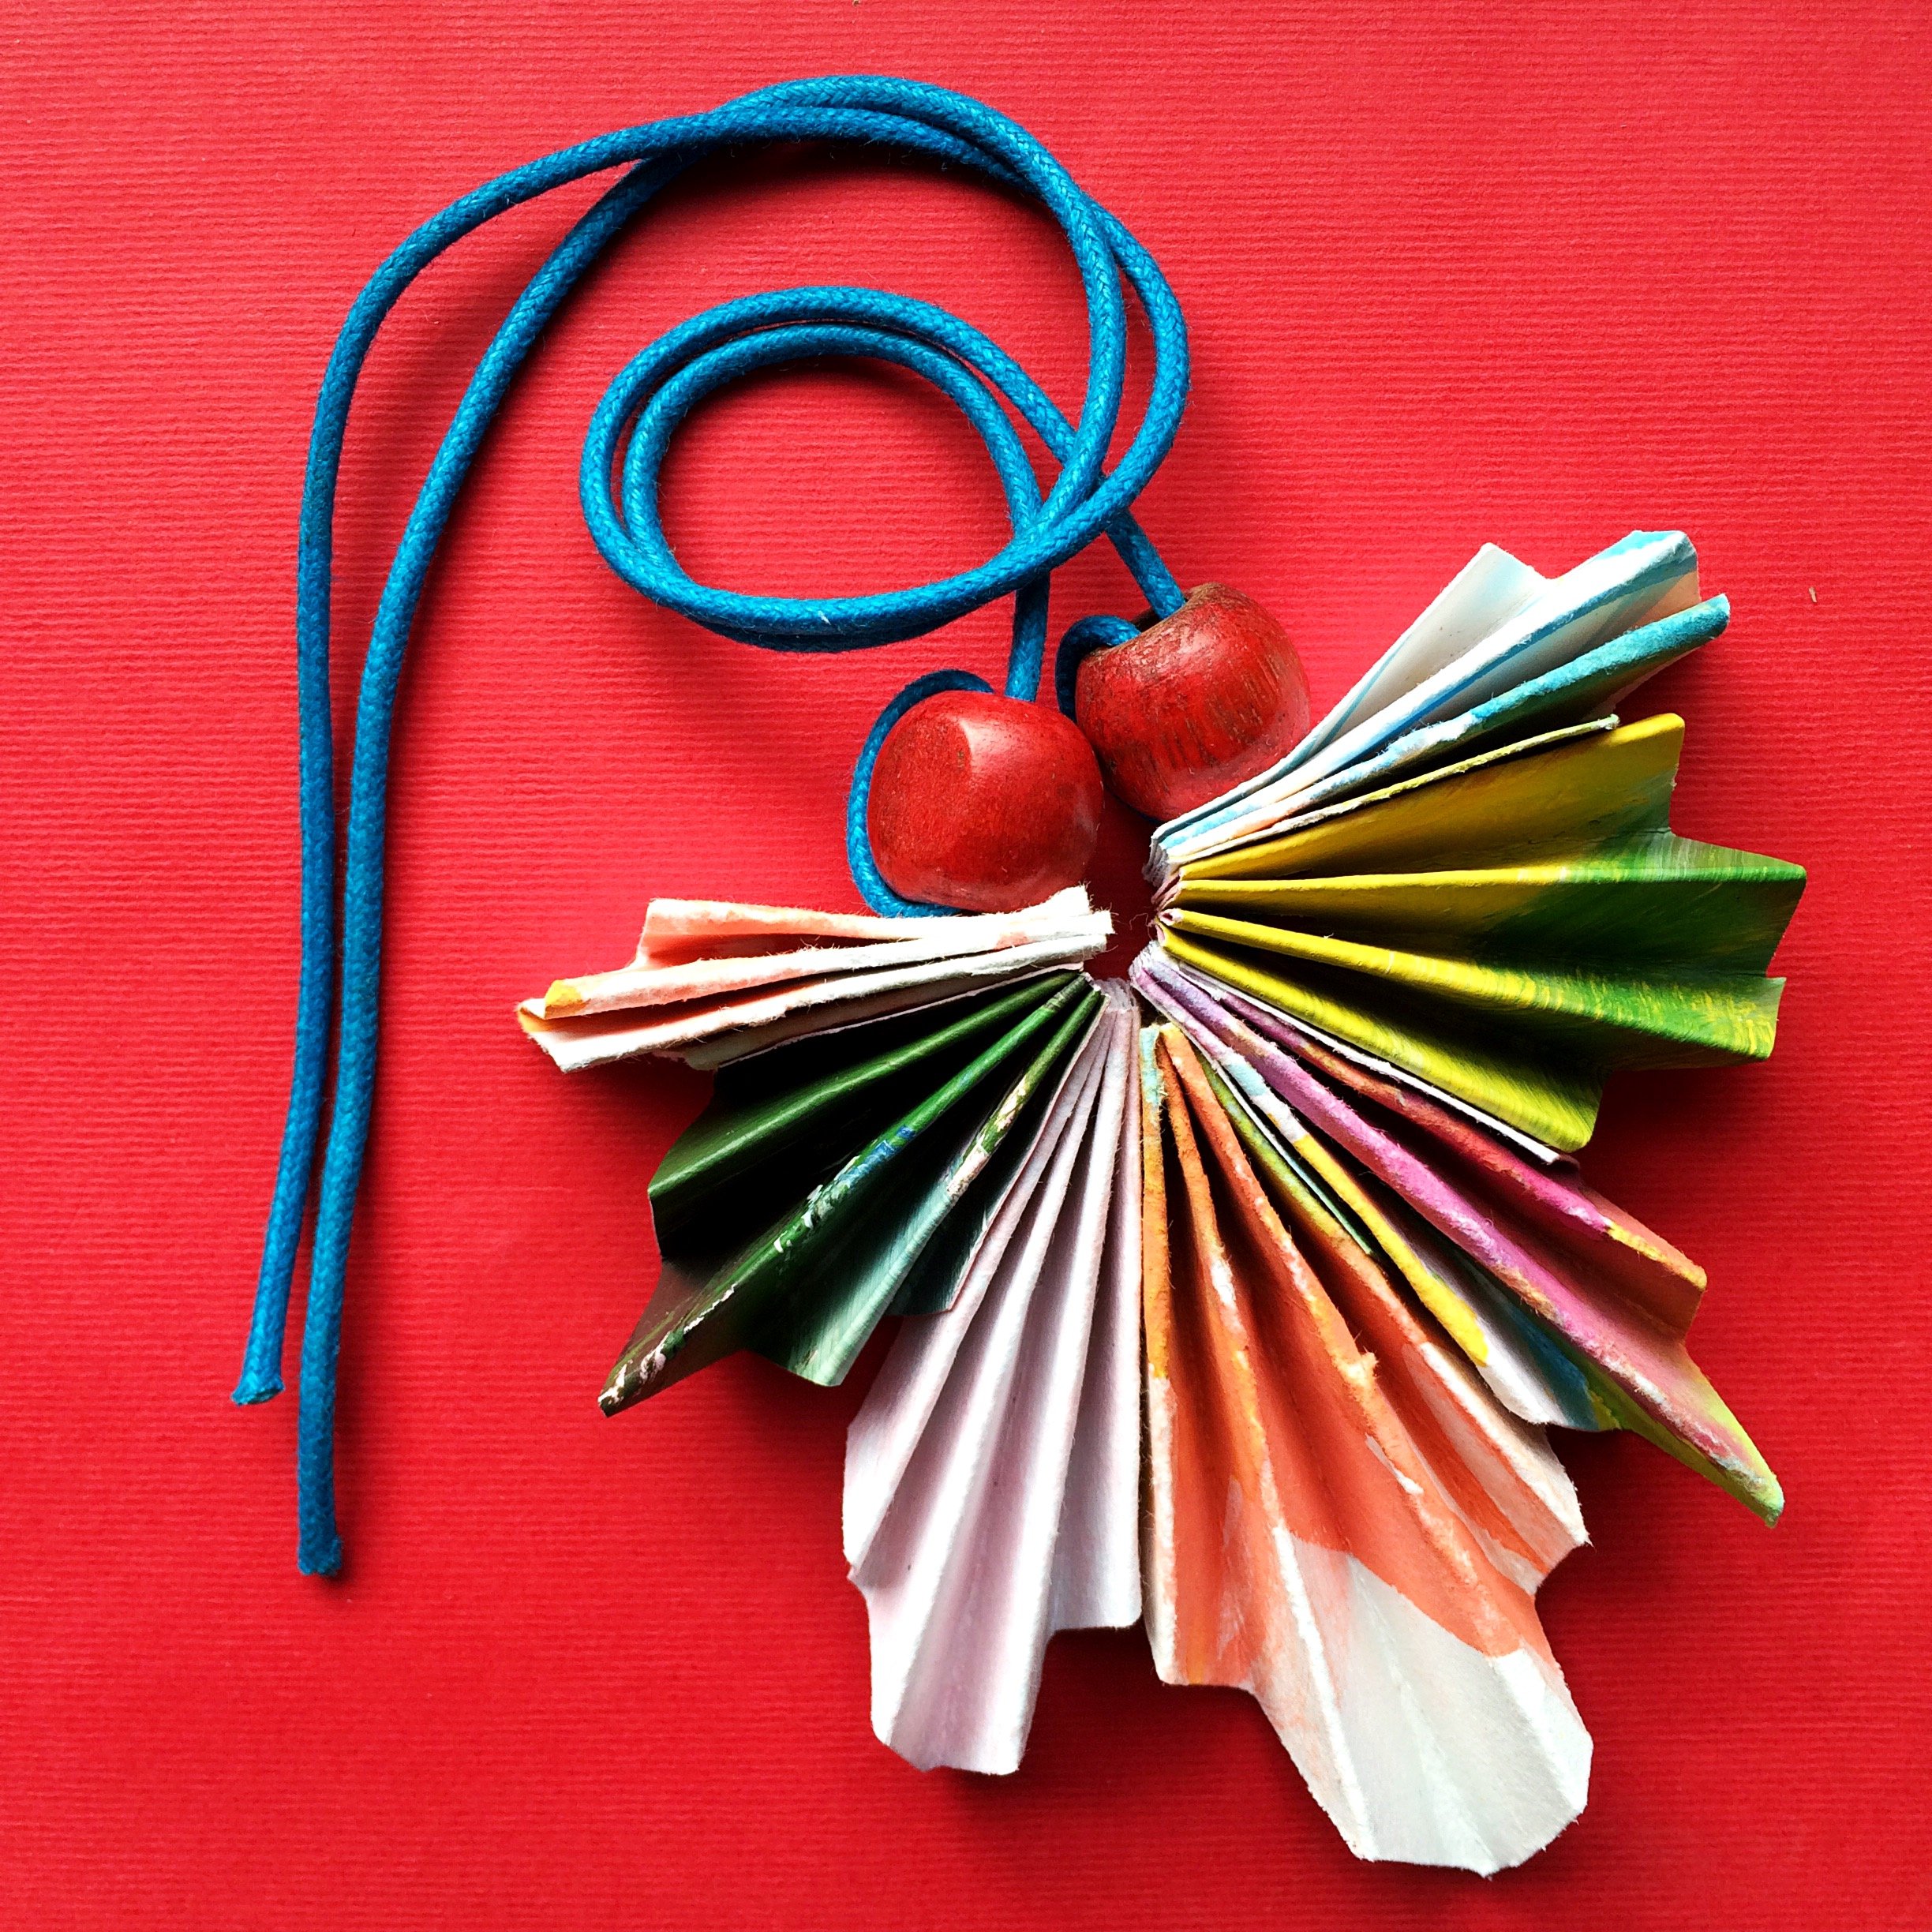
This Jewellery designer in me loves this project and the little girl does too! It uses old artworks, basic materials and is fun (and a little bit tricky) for little hands. I would say suitable for maybe 8+

what you need
- An old artwork
- A piece of thread
- Two beads
- Scissors
- A hole punch
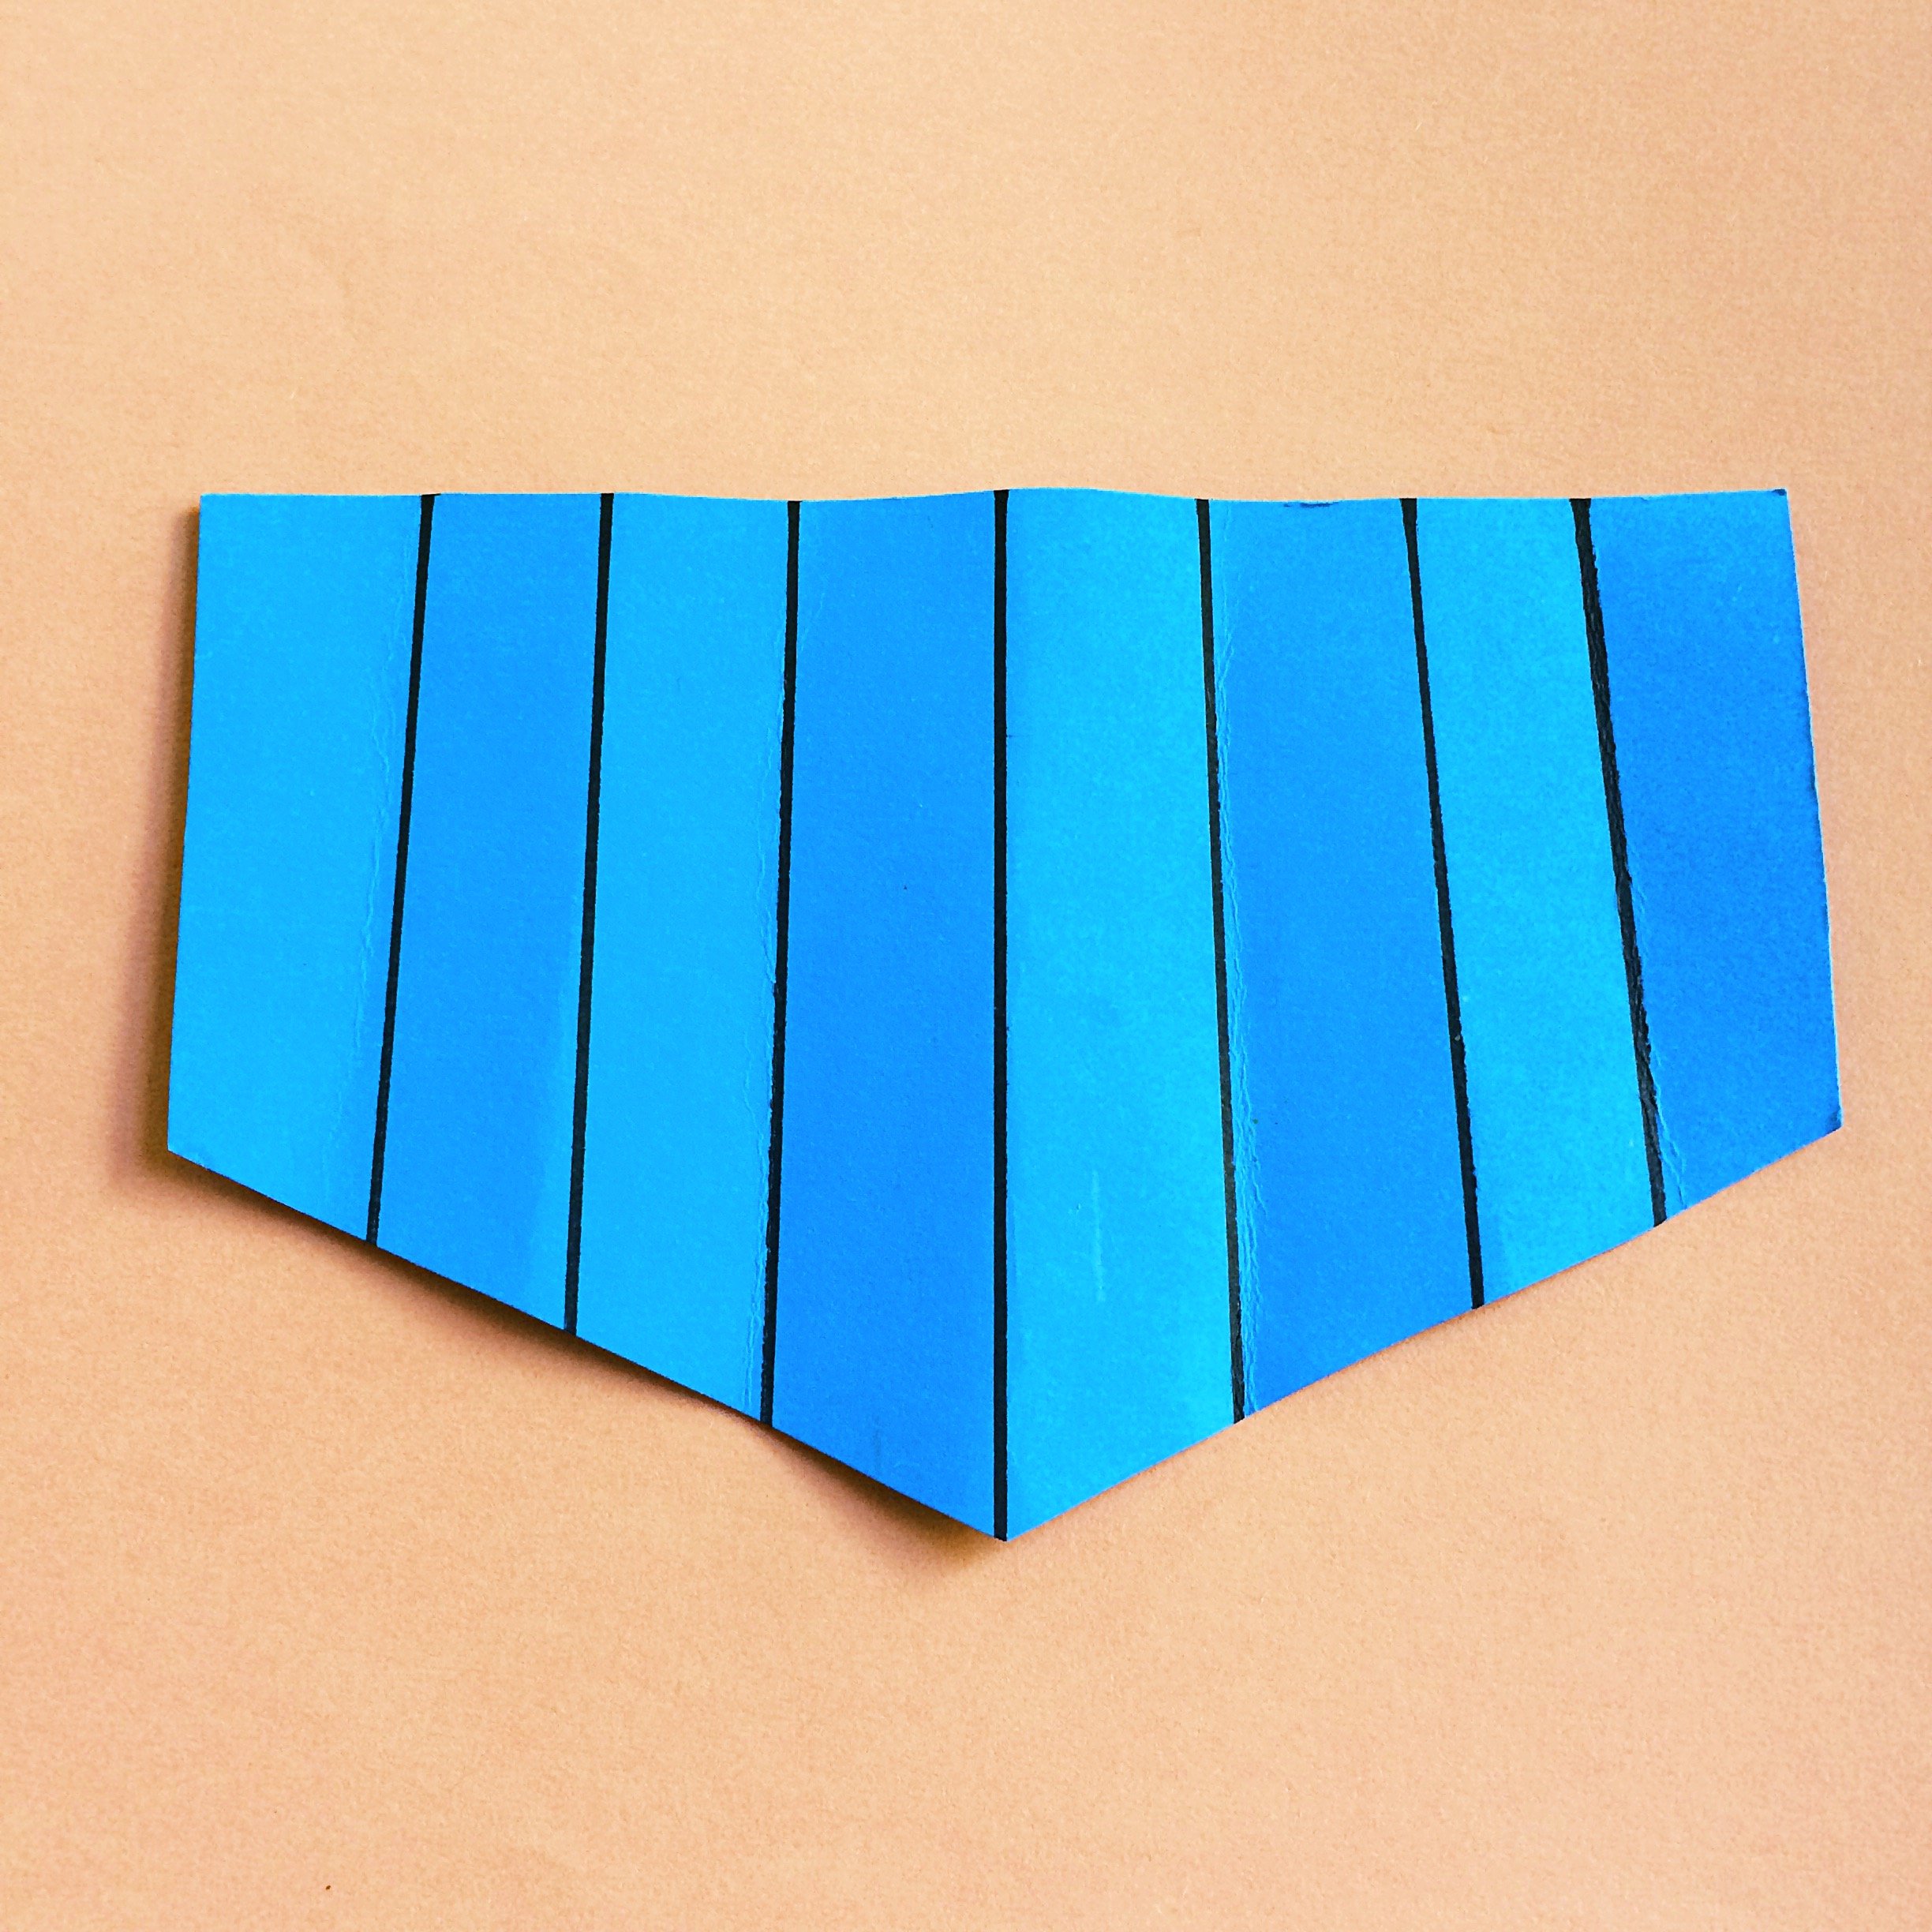
1. This is the basic shape you need for making each of the pieces. The piece above is 6.5cm x 6.5cm at each point. 5cm high and 12cm across. The lines are spaced 1.5cm apart. Now that all sounds a bit technical but don't be put off as it really doesn't matter what size your pieces are as long as they are the same on both sides.
Draw this shape onto the back artwork that you will be using and then cut it out with scissors.
2. Concertina fold the shape as per the lines you have drawn
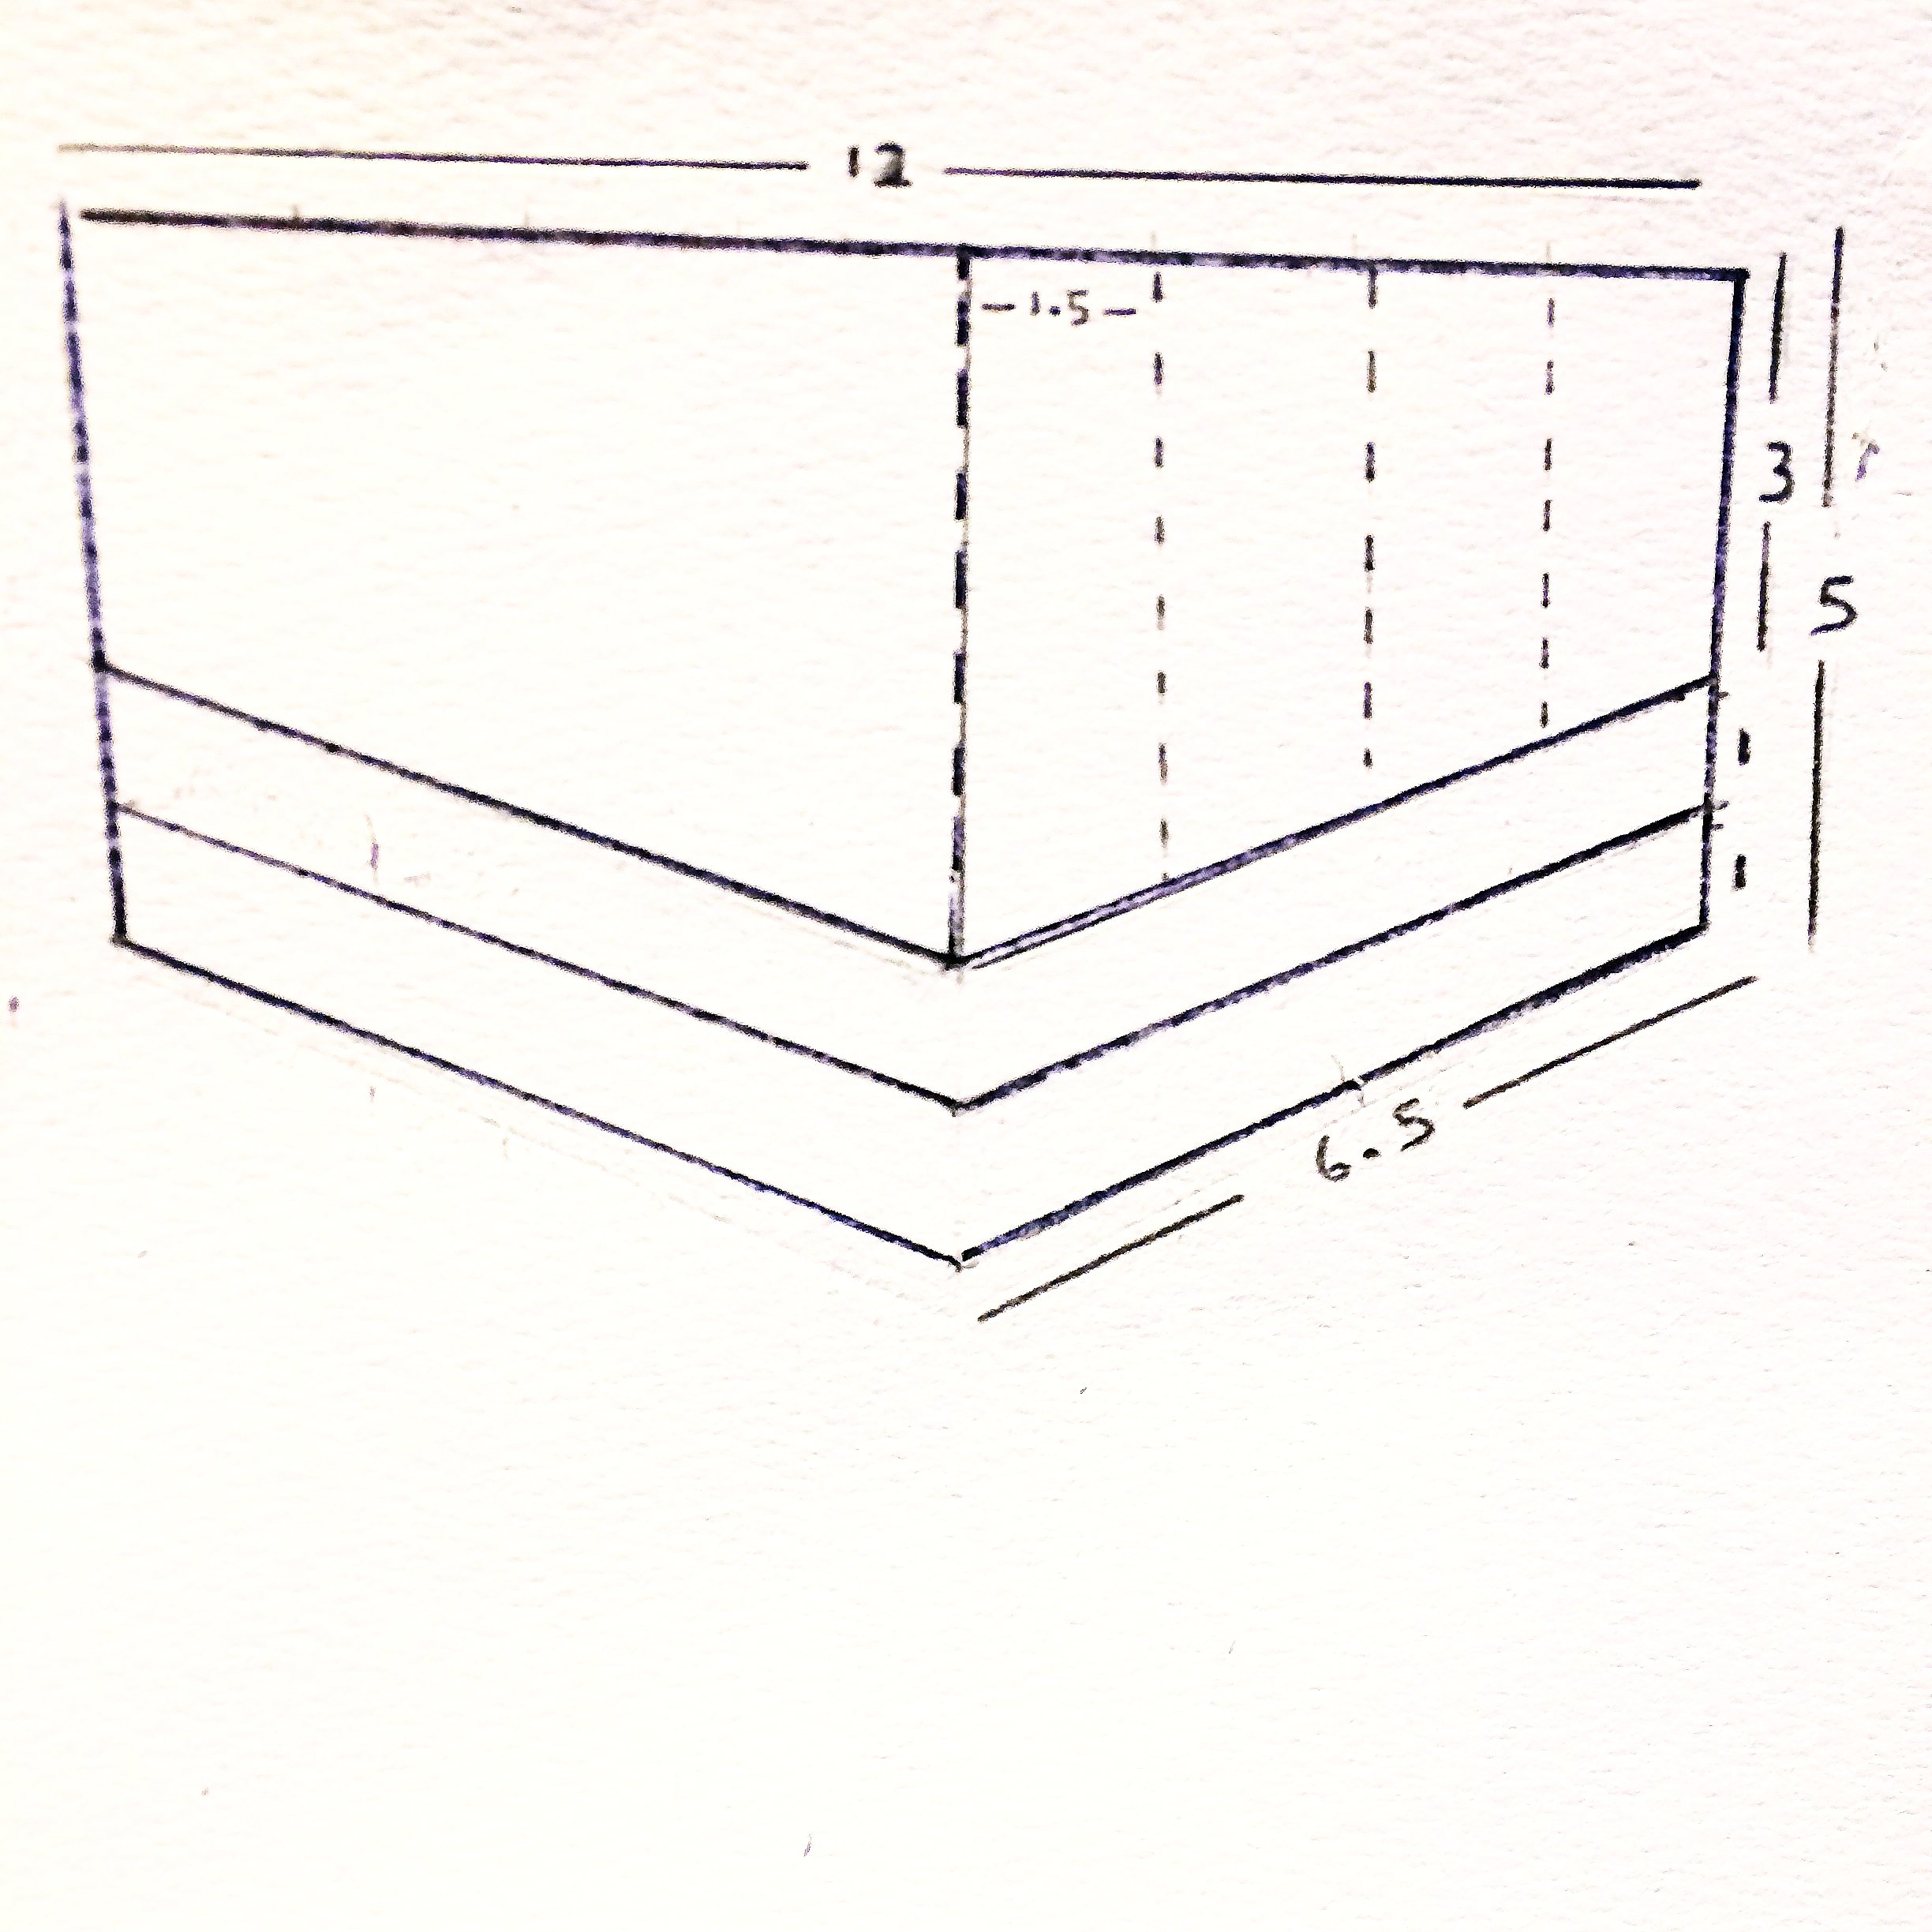
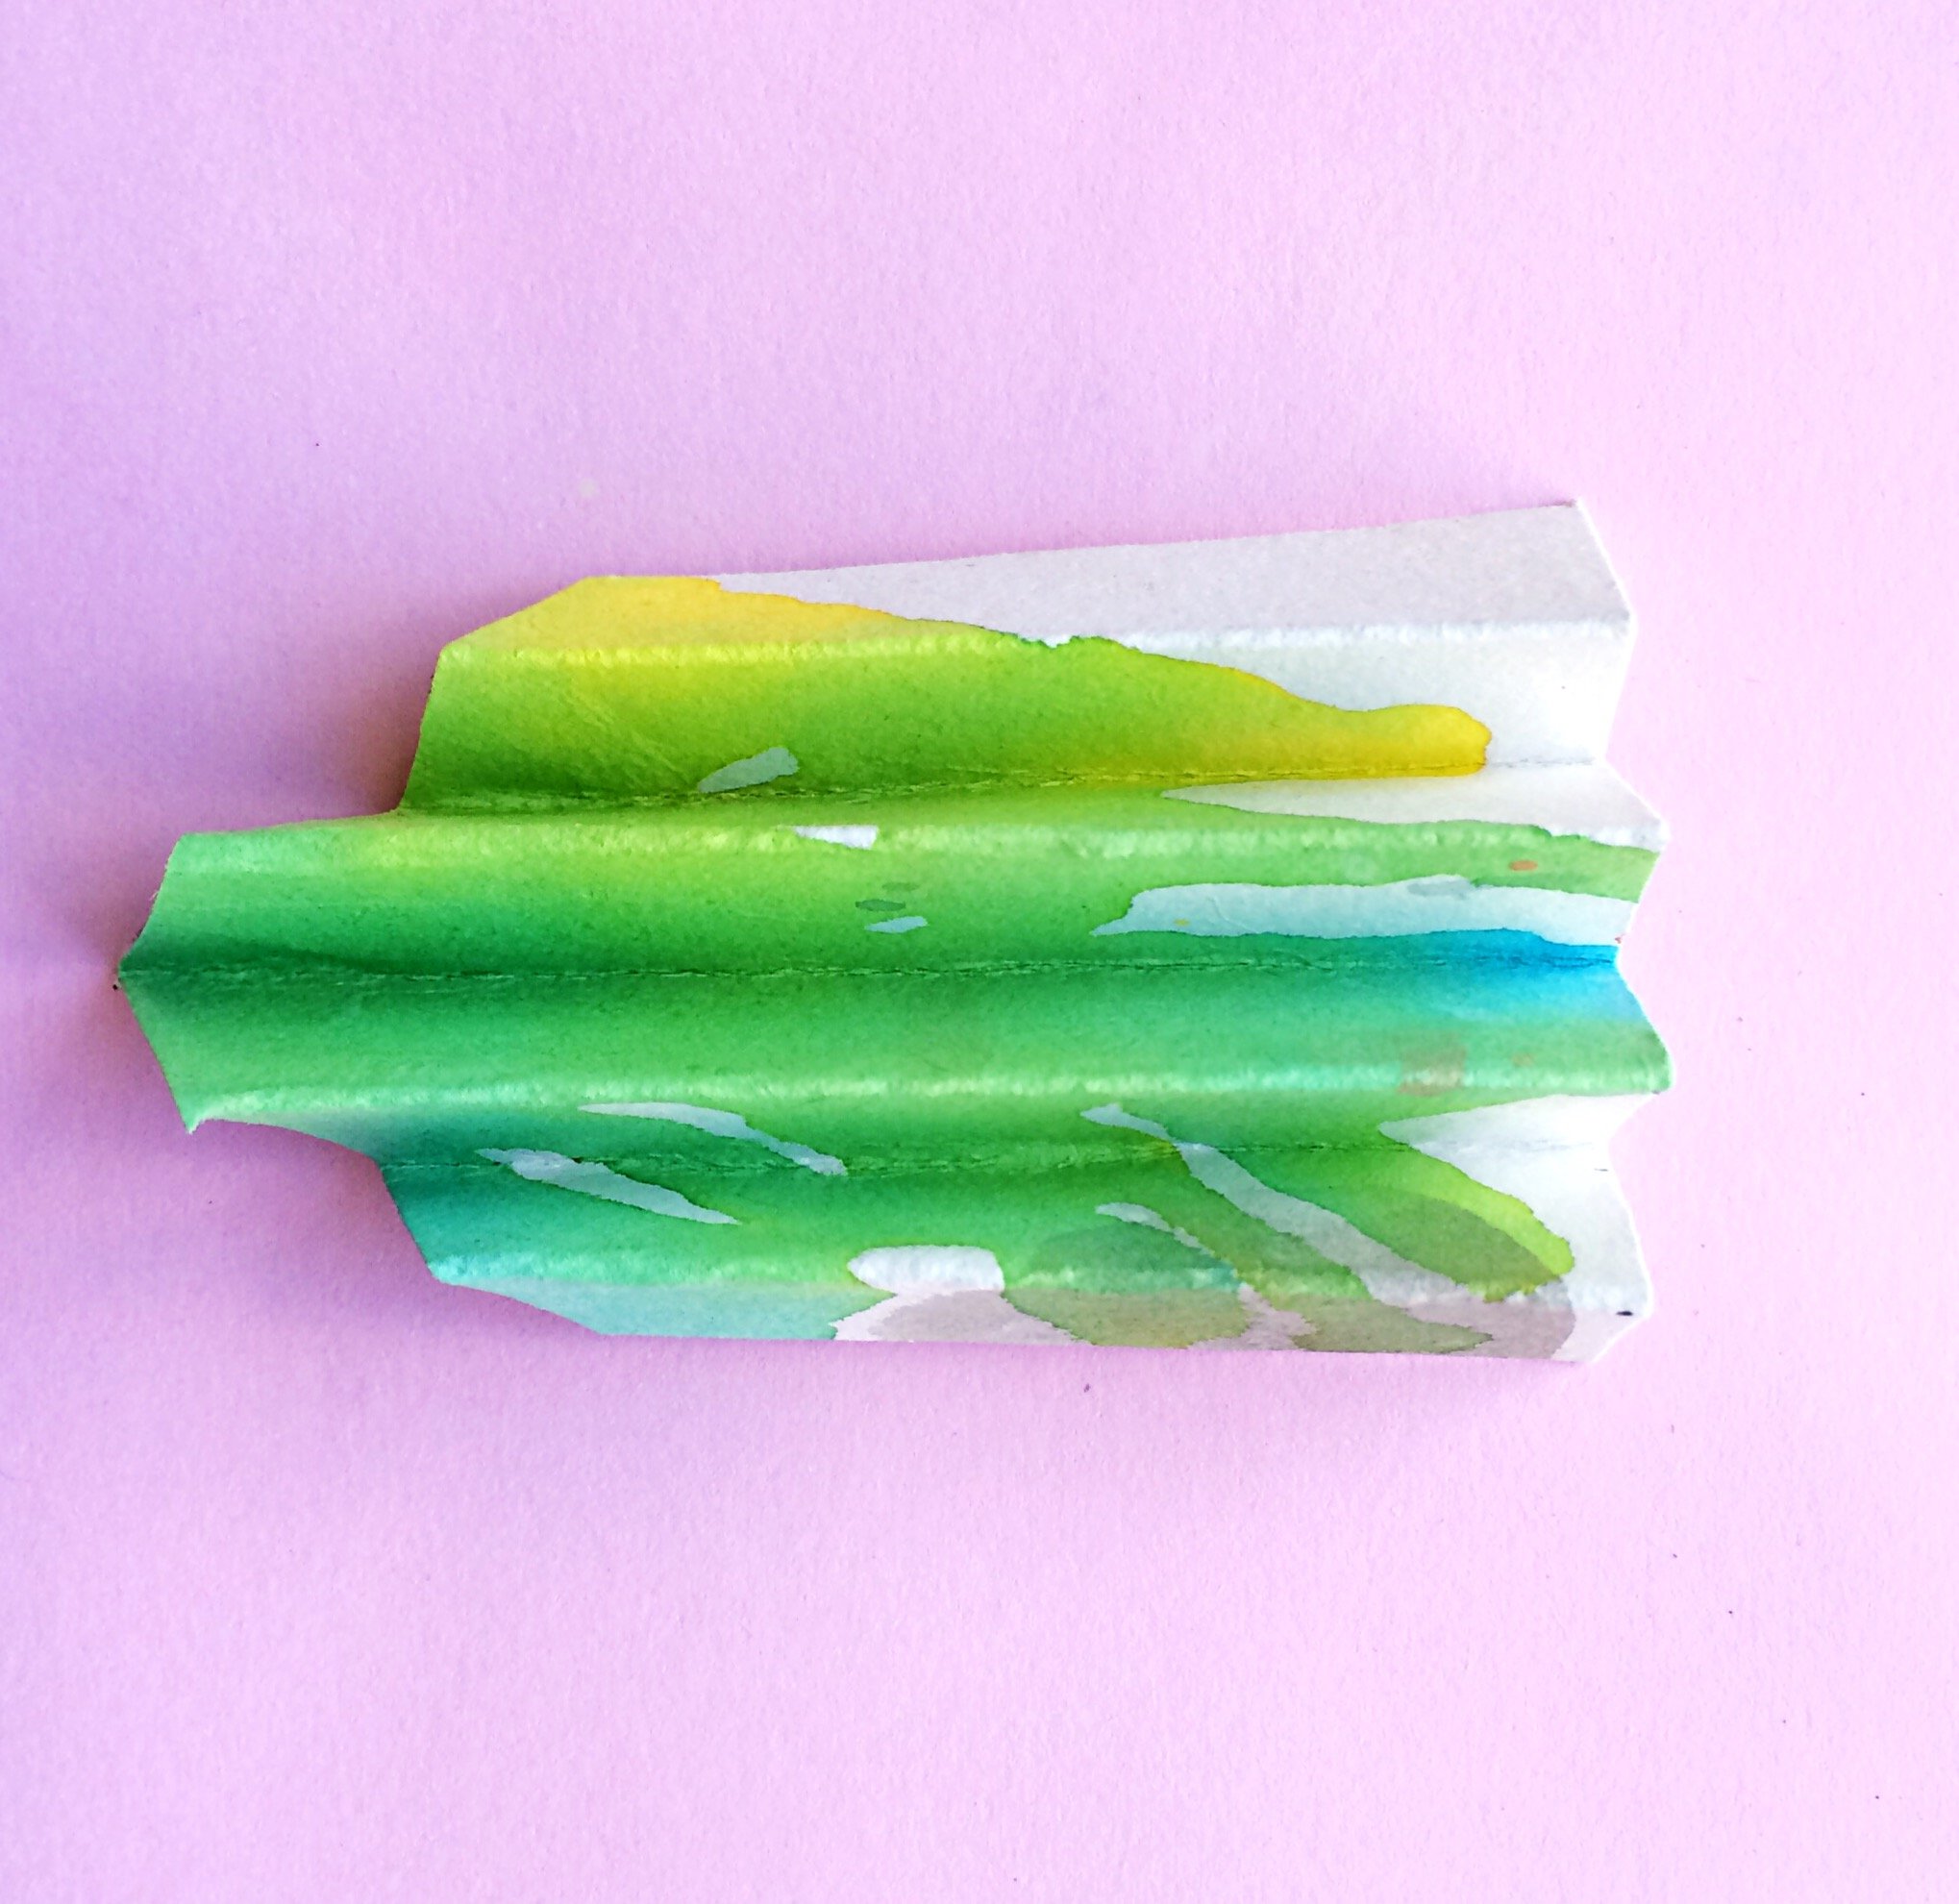
3. Now this is the tricky bit. The key to getting the shape as per my example to too slightly reduce the size of the pieces on either side of this first piece. The next piece is 12cm across and 6.5cm at the points but is 4cm high and the third piece is the same but 3cm high.
DISCLAIMER: Argh, this is getting a bit hard! don't be put off. If you don't want to follow the measurements exactly, feel free just to experiment with the basic principal of cut then concertina in any shape and size you want.

4. Insert the top of the piece into a hole punch and try and punch through the whole thing in one go. If your paper is too thick you may have to hole punch each section. be careful to do this evenly so the holes all line up.
5. Thread all of your pieces onto the thread. Start with the largest followed, add the two smaller ones on either side then finish with the smallest two.
6. Next add one bead to each side. Take the end of the thread and loop it over the bead bringing the thread underneath and through the center of the bead again. Repeat on the other side.
7. All done, now to think of somewhere fancy to wear it!
